This article explains the steps on how to mail a claim to the secondary insurance with the primary EOB. There are two different scenarios for this type of claim:
- When the secondary insurance is not contracted with the clearinghouse, and you are using a PRNT payer ID.
- You are using an electronic payer, but the specific payer does not accept secondary claims electronically.
DrChrono makes it easy for you to identify these types of claims by sending an error message when you select the Billing Status as Bill Secondary Insurance.
"Error message: Appointment updated, but billing will not be processed: Paper claim for secondary insurance can not be transmitted electronically. You have to manually send the claims along with the primary EOB".
When you receive the above error message while billing the secondary claims, you will need to follow the steps outlined below to print the claim and the primary EOB:
- Hover over Billing and choose Live Claims Feed
- Search for the patient and click on the visit date, which will take you to the billing details screen
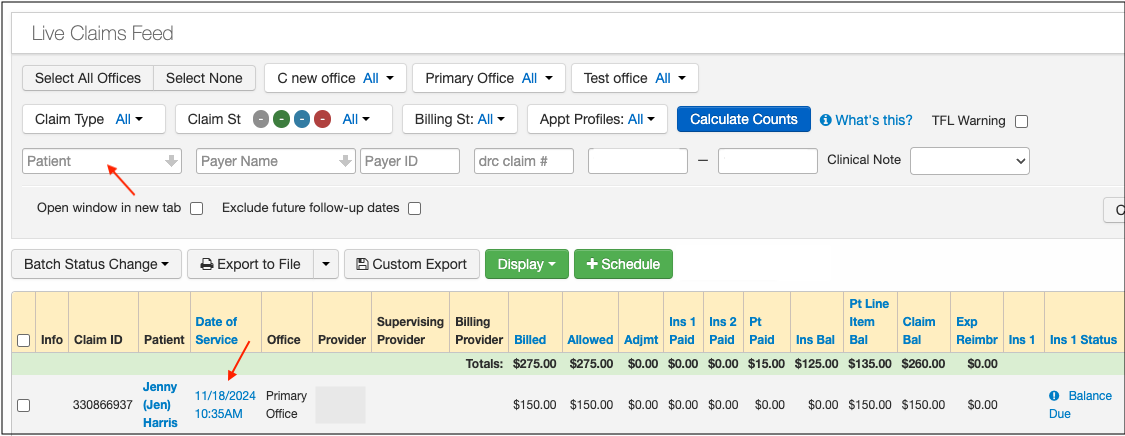
- To print the claim form, select HCFA/1500 if you are printing on regular white paper or click on HCFA/1500(text) if you are using the pre-printed red HCFA-1500 paper. The information on both is the same; the only difference is whether the red outline of the form is printed.
 All patient data listed in this article is sample data. This is not a real person or real patient data.
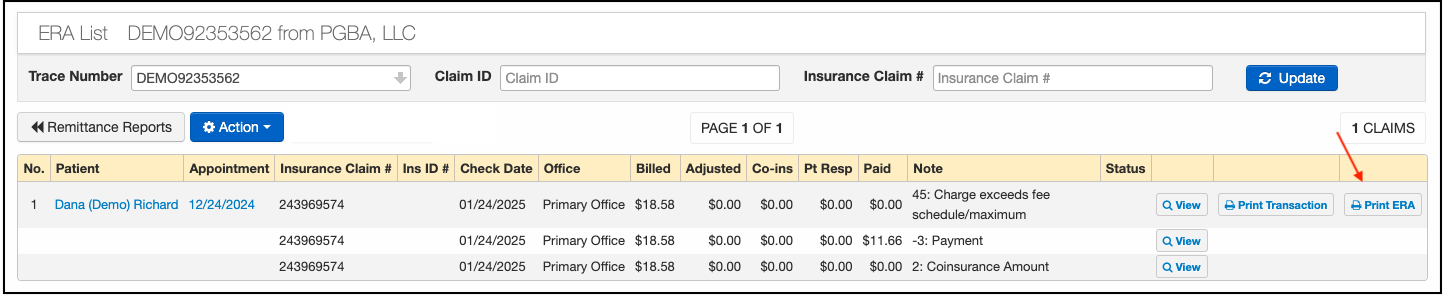
 - To print the primary EOB, scroll down toward the line item(s) and press the magnifying glass next to the check number.

- This will access the Remittance Reports screen.
- Select Print ERA on the right corresponding to the patient's visit date. This will print the details of the patient's single date of service.
 All patient data listed in this article is sample data. This is not a real person or real patient data.
Sample of how the EOB will look. It can be printed and submitted with an HCFA to a secondary payer.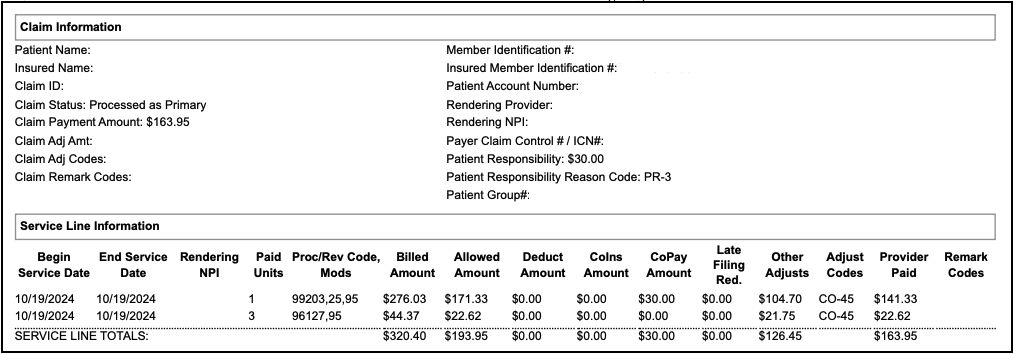
- If the payment was included on a paper EOB and you have the EOB uploaded in the system, press the green View EOB. From there, you will be able to print the page of the EOB to submit with your claim.

- To print the entire ERA, select Action > Print. This will print the entire ERA, including all patients and dates of service.


