Please Note that Stripe is not available to new customers. Please see our article on DrChrono Payments for setting up payment processing.
DrChrono allows you to process patient payments through the patient's credit card. You can do this through the DrChrono website or allow the patient to pay through OnPatient. Stripe is available to process credit card payments in DrChrono.
Stripe Onboarding and Account Verification Process
With recent changes in legislation, Stripe is now required to have more information about each business on file. For that reason, our customers will need to update their Personal and Bank Account Information in order to keep using Stripe beyond the deadline of November 2, 2020.
In this article we will look at:
- Verifying an Existing Account
- What to do if you no longer use your Stripe Account
- Processing Payments with Stripe through DrChrono and through OnPatient
Verifying an Existing Account
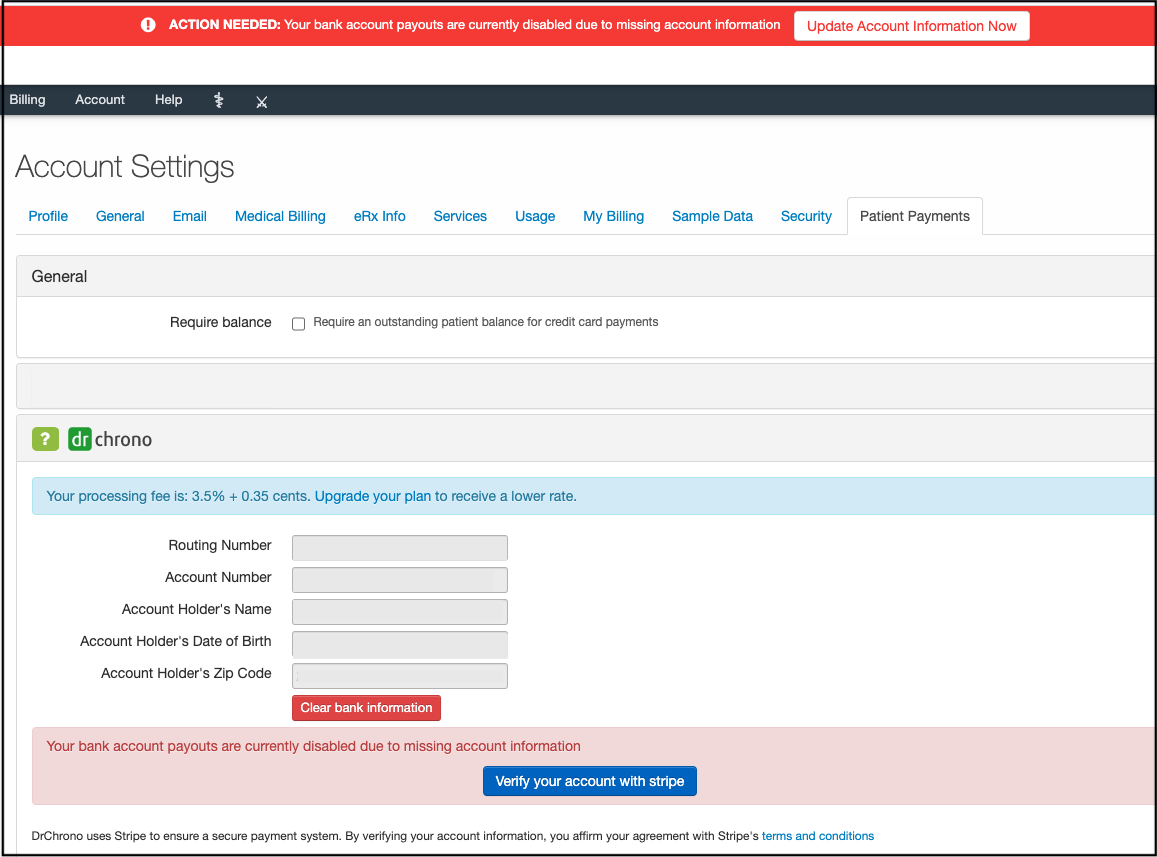
You may see an alert notification at the top of your DrChrono account asking you to update your account or account information.
A red notification means the account has payouts or patient payments is currently disabled.

An orange notification means the account has payouts or patient payments will soon be disabled (usually in days/few weeks).

- You can press the Update button to be taken to the Patient Payments settings or go to Account > Provider Settings and select the Patient Payments tab.
- Once in Patient Payments, press Verify Your Account with Stripe to continue.
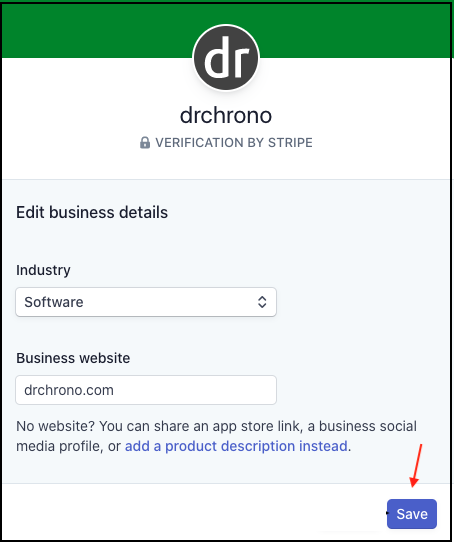
- After the verification process starts, Stripe will let you know what missing information is required to get the account fully verified. Update all fields marked in red.
- Press Update next to Your Business.

- Edit the business details and press Save.
- Press Update next to Management and Ownership.
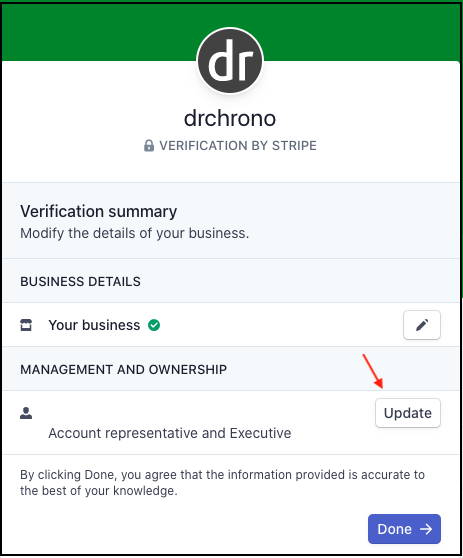
- Enter the information and press Done.

- You may see a Pending verification message. Pending verification happens when information can’t be checked in real-time.
For certain types of verification like ID verification where you might upload a driver's license photo, verification might take a few minutes. Other types of verification might even take longer, but usually, verification happens fairly quickly.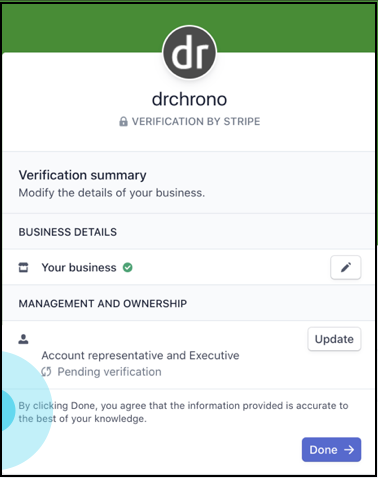
- Your account is verified when no further account information is needed.


No Longer Using Stripe
If you had previously set up Stripe in your DrChrono account, but are no longer using it, you will still see the alert messages to verify your account.
To verify:
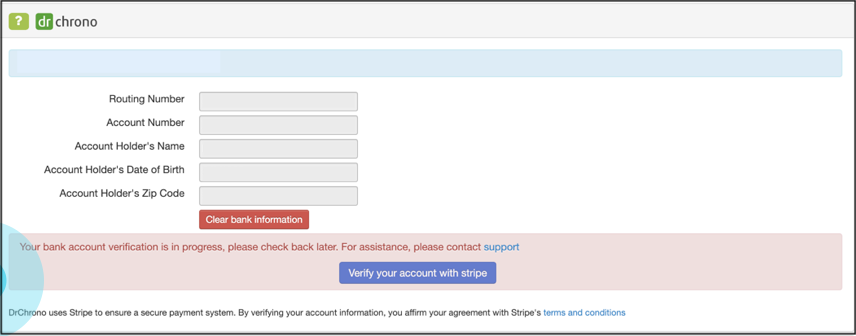
- Navigate to Account > Provider Settings
- Select the Patient Payments tab.
- Press the Clear Bank Information button.

Processing Payments with Stripe
After setting up and verifying your account, you can process online credit card payments or have patients pay via OnPatient.
Payments through DrChrono EHR Web
- Navigate to the patient's appointment window > Billing tab
- Press the blue +
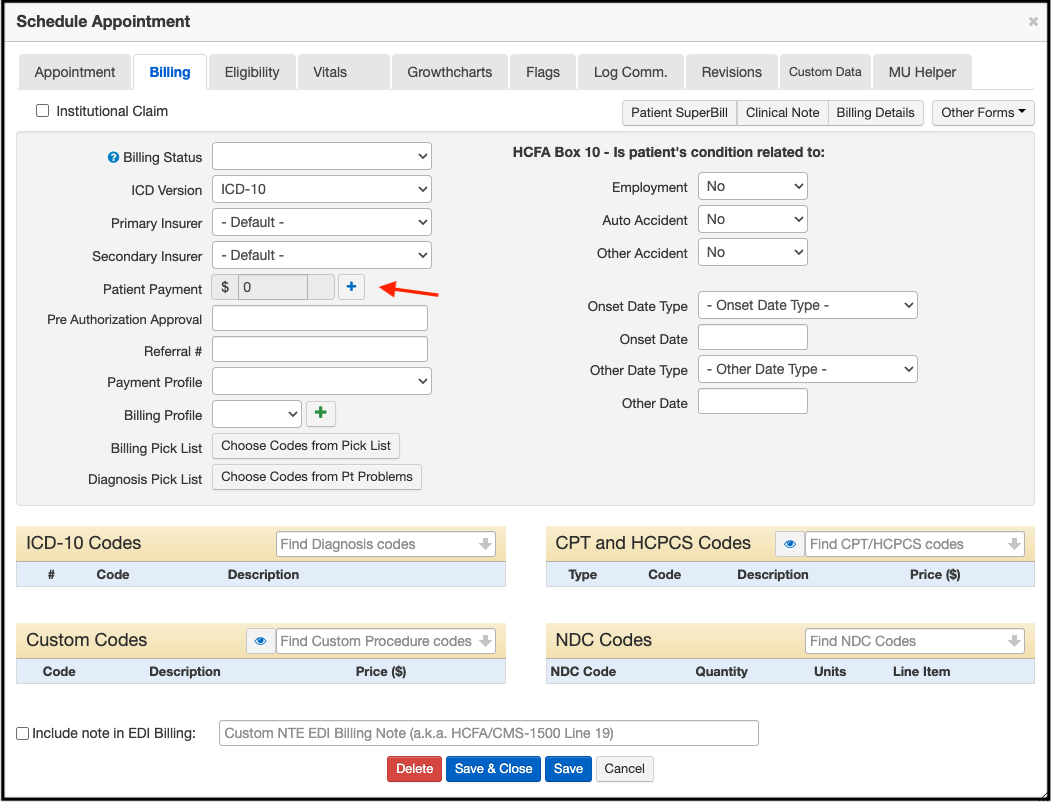
- The New Cash window will open. It will allow you to process the payment and send the patient either an email or text receipt.
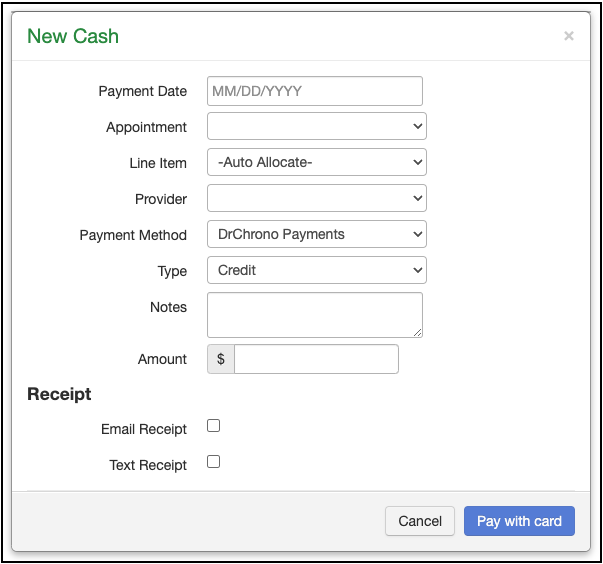
- The record of the payment will appear in the Transaction History in the patient's chart.


Payments via OnPatient
- Navigate to Account > Provider Settings > Patient Payments
- Scroll down to the OnPatient tab
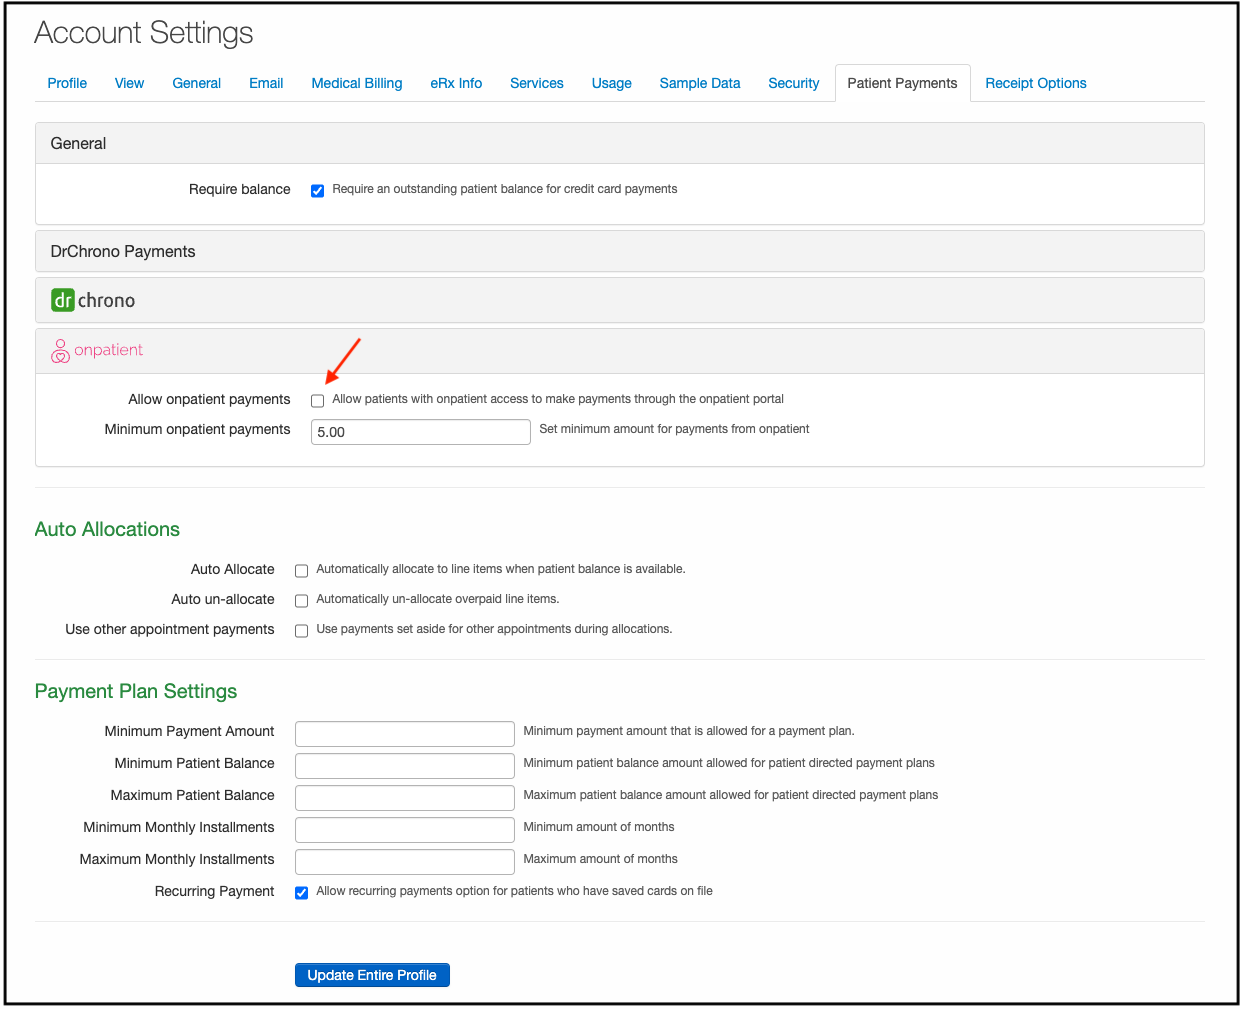
- Select the box to allow OnPatient payments
- Fill in the minimum amount you would allow to be processed through OnPatient

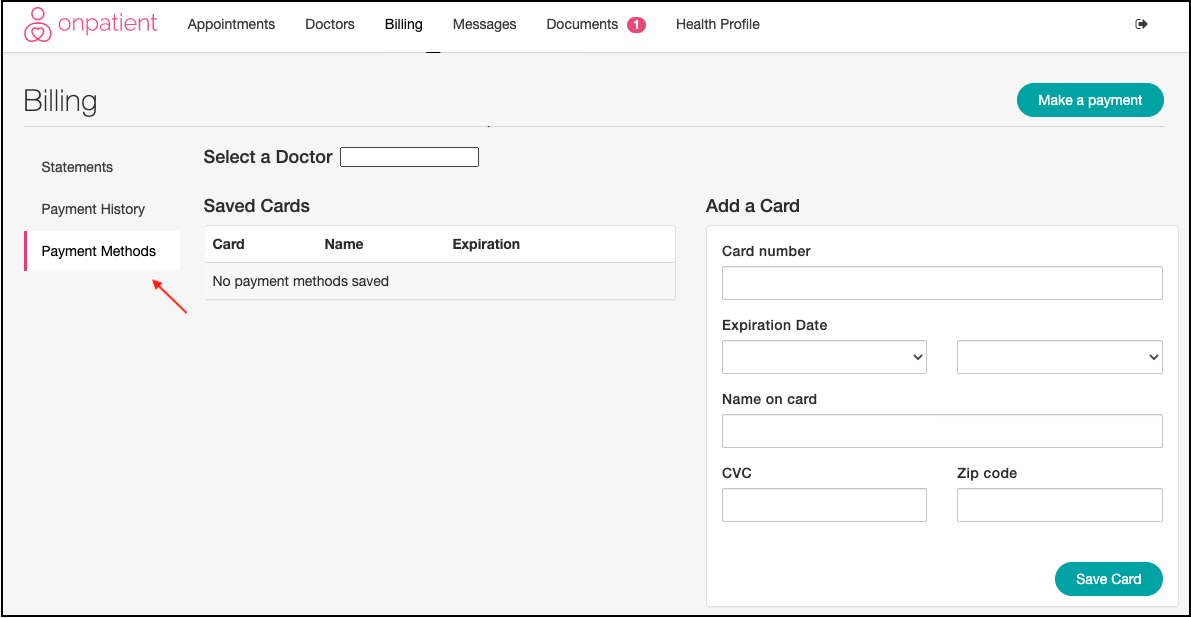
A patient can add a card to make a payment via their OnPatient Portal after logging in.
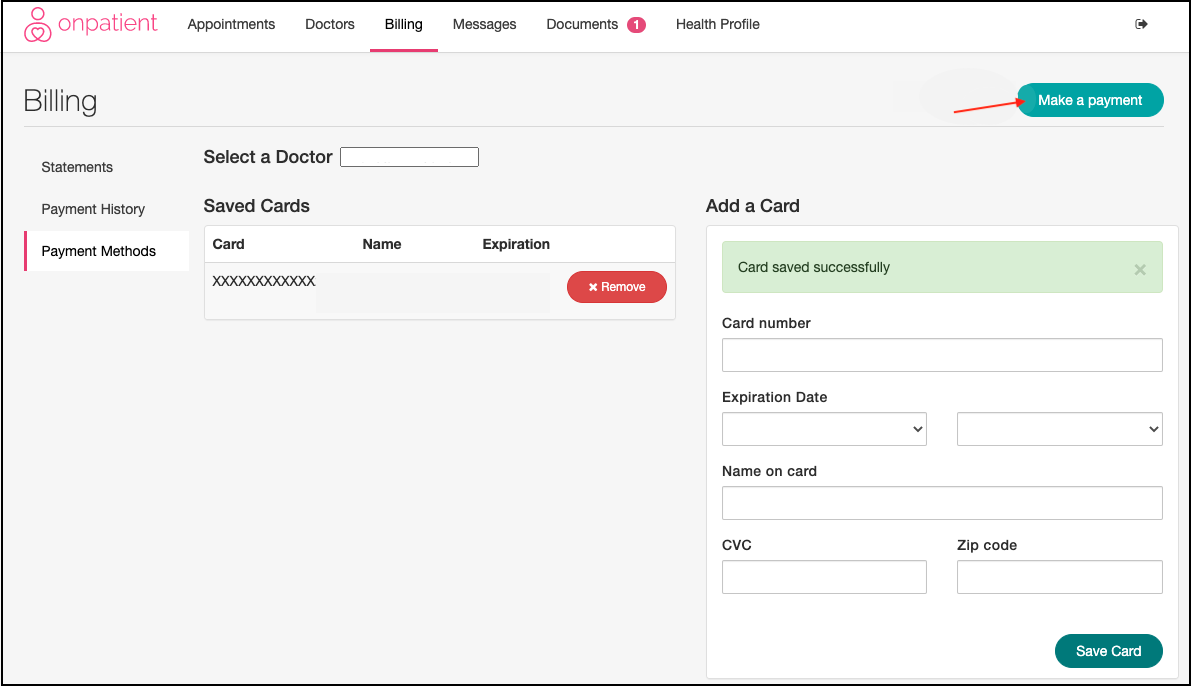
- Navigate to Billing > Payment Methods. Enter the card information and press Save Card.
- The patient can then press Make Payment or if you have sent a statement to OnPatient they can go to Statements > Pay.
- The record of the payment will appear in the Transaction History in the patient's chart.

