Increasingly, employers are offering employees an HRA, or Health Reimbursement Account, to help offset medical expenses. It's not an insurance payment or a patient payment.
Currently, we do not have the option to post the HRA payment and designate it as such in DrChrono; however, as a workaround, we can post the HRA payments in two ways.
- Adding HRA as secondary/tertiary insurance
- By posting as a patient payment.
Option 1 - Adding HRA as secondary/tertiary insurance
Let's see how to post the payment by adding HRA as an insurance.
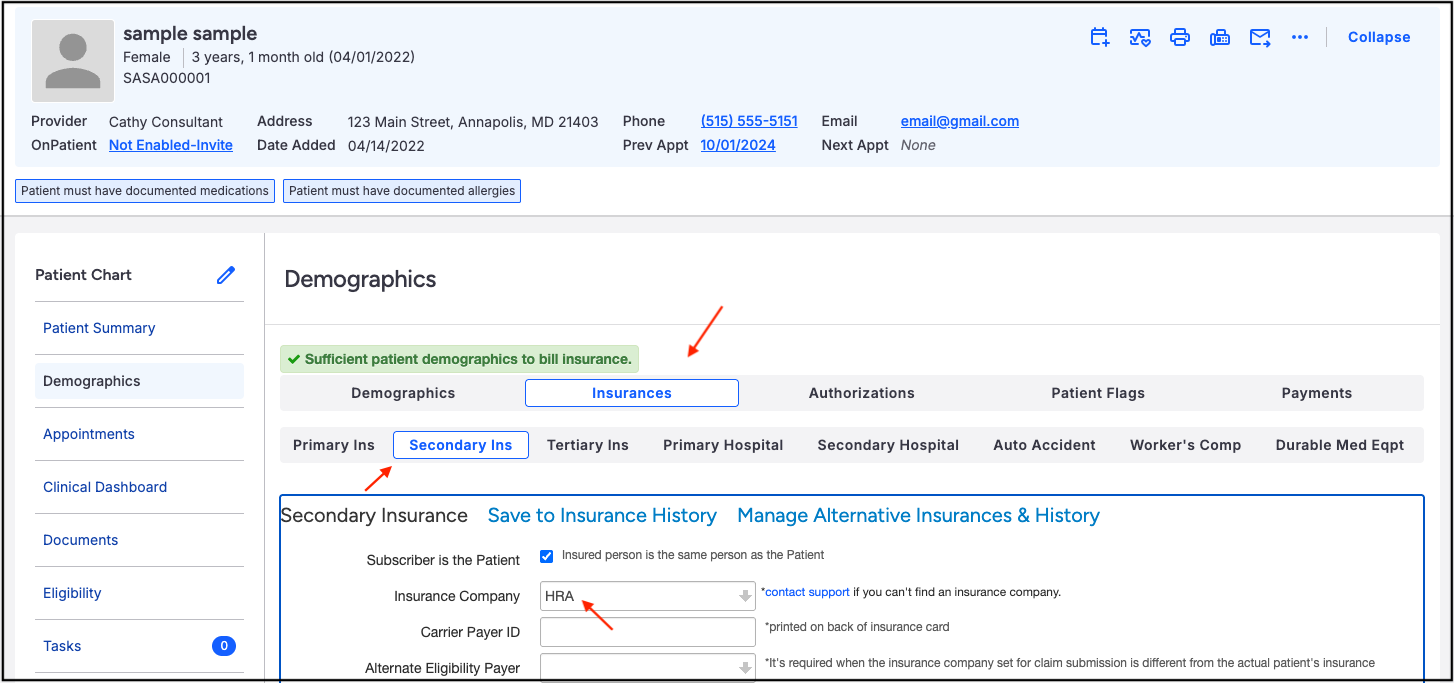
- Open patient demographics
- Navigate to the Insurances tab, and select secondary insurance. (If the patient has secondary insurance, you can use the tertiary insurance tab instead.)
- Enter HRA in the Insurance company field and press Save Demographics.
- Open the appointment’s billing details screen to which we need to post the payment.
- Press the + sign corresponding to the line item to add a new transaction.
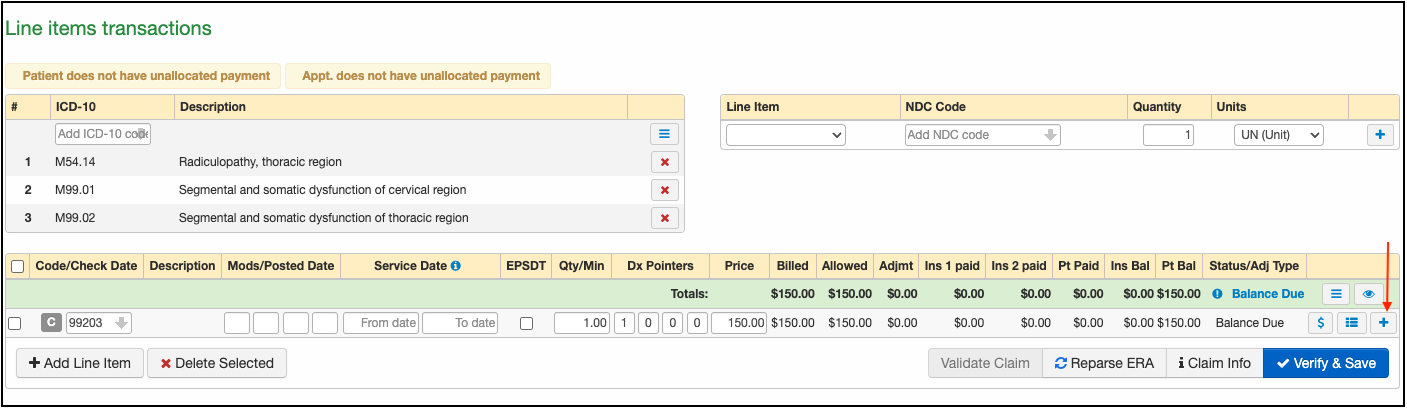
- Select the check date, and posted date, and enter the check# if you have one. Entering the check number here will be helpful if any research is needed for the payment in the future.
- In addition, you can scan and upload a copy of the check and add it to the account so that if an image of the payment is needed in the future, it can be accessed easily. See this help desk article for information on how to scan and attach EOBs to your account (link).
- From the reason code drop-down, select Insurance payment and enter the payment in the Ins 1 paid field.

- From the insurance drop-down, select [2] HRA (or [3] if in the tertiary insurance field)
- Press Verify and Save.


Option 2 - Post as a patient payment
Now, we will see how to post HRA payment as a patient payment.
- Navigate to Billing > Patient Payments
- Select the Payments tab and enter the patient name in the respective field and press Update.

- Select the patient and their patient payment tab will open. It will display all payments received, along with any unallocated money the patient has on their account.
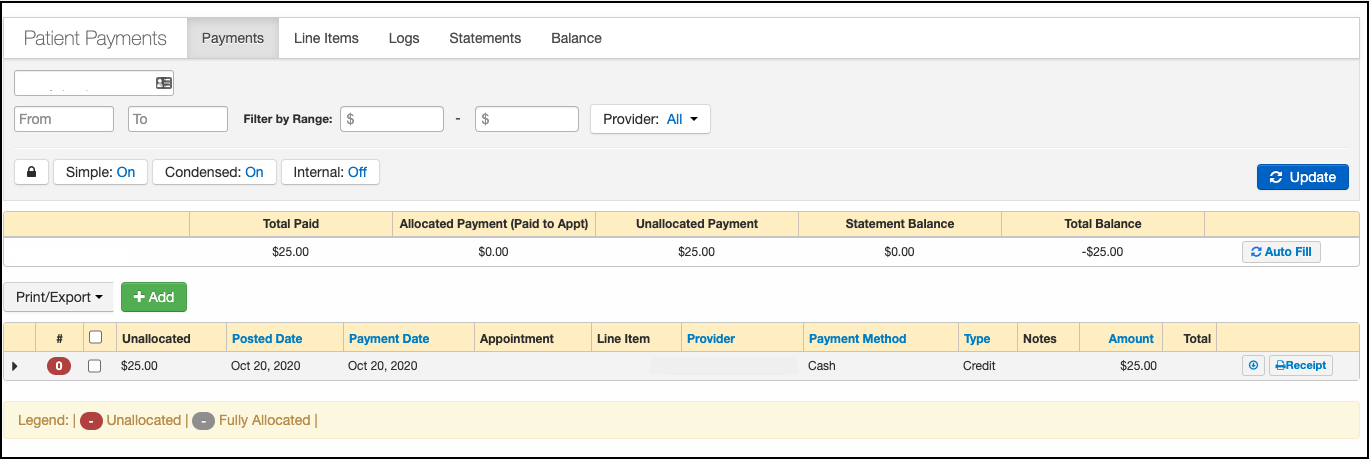
- To add a payment, press the green + Add button

- A New Cash window will open so you can enter the payment details.
- Payment Date - The date you are posting the payment
- Appointment - You can use the drop-down to assign the payment to a specific appointment, or if you leave it blank the payment will be added to the patient's unallocated payment section to be used at a future time/future visit.
- Line Item - If you select a specific appointment to apply the payment, you can specify which line item (CPT/HCPCS/Custom Code) the payment should be applied to. Any charges on the specific appointment will show in the drop-down.
- Provider - this line designates the provider for the specific payment. It can be left blank if you prefer.
- Payment Method - this is to identify the type of payment (cash, check, etc)
- Type - this is to specify the type of payment.
- Credit - a payment on the account
- Refund - an amount is being refunded to the patient
- Correction - used to correct a previous posting error
- Copay/Coinsurance - used to identify the payment as a copay/coinsurance
- Other - used for situations not specifically mentioned above
- Notes - This section is used to document check/money order numbers or any other details about the payment that could be useful later. The information listed here can come in handy if any research is needed in the future regarding the payment.
- Amount - amount of the patient's payment
- Receipt - select whether to send the patient an email or text receipt
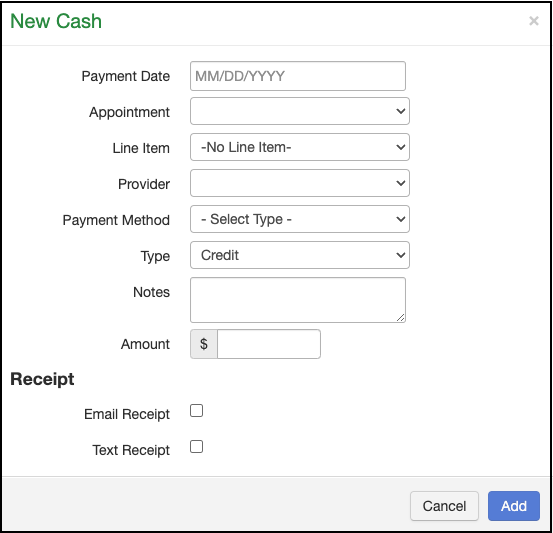
- Enter the payment details and press Add.
- The payment will now be visible on the patient's account. If it is not applied to a specific appointment, it will show as an unallocated payment.
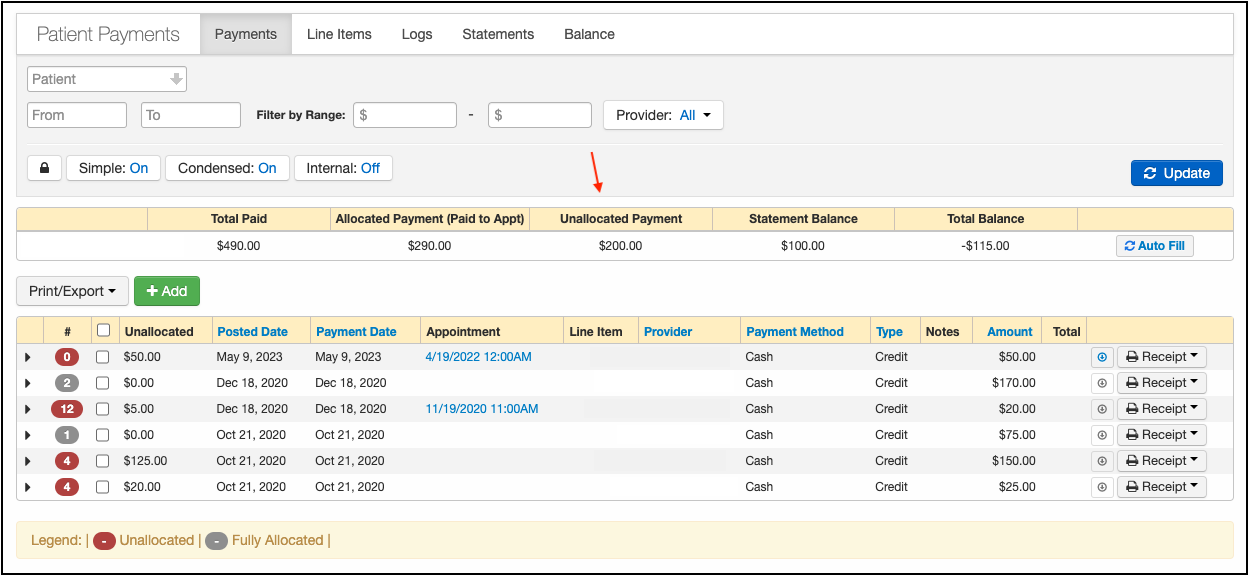
- You can also use the red/gray bubbles as a visual to see if a patient's payment is unallocated or fully allocated. The black arrow just to the left of the red/gray bubble will expand and show you additional details regarding how the payment was applied. This is especially useful when the payment has been applied to multiple appointments.

- To move money from Unallocated Payment and associate it with an appointment, press the circle on the right, sometimes referred to as a radio button.

- A Move Cash window will open. This will allow you to select the appointment, the line item, and the amount to transfer.
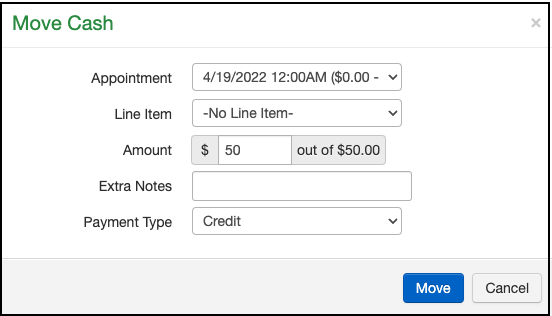
- Once all fields are filled in, press Move, and the system will move the cash as you have requested.


