To make things easier to post multiple payments from a single-payer EOB, DrChrono has an area that allows for the posting of multiple lines of transactions instead of adding a line item for each charge.
- Navigate to Billing > Live Claims Feed
- Select the patient by name. You may also need to expand the date range. The system will default to 1 month from the current date, but you can change the beginning date back a year or more to ensure that you capture all of the patient's appointments.
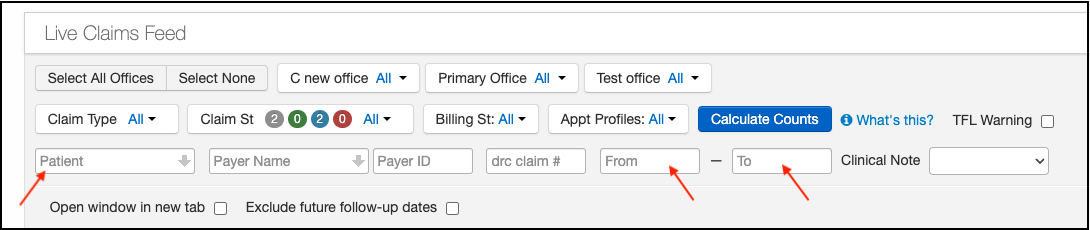
- Select the date of service that corresponds to the payment received
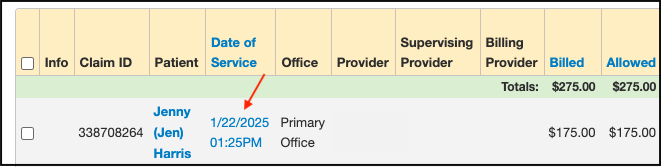
- Scroll to the bottom of the page to where the charges are showing. Press the Add Batch Transaction icon, which is on the right side of the screen, directly across from the code, and charge. You only need to press on 1 of them.

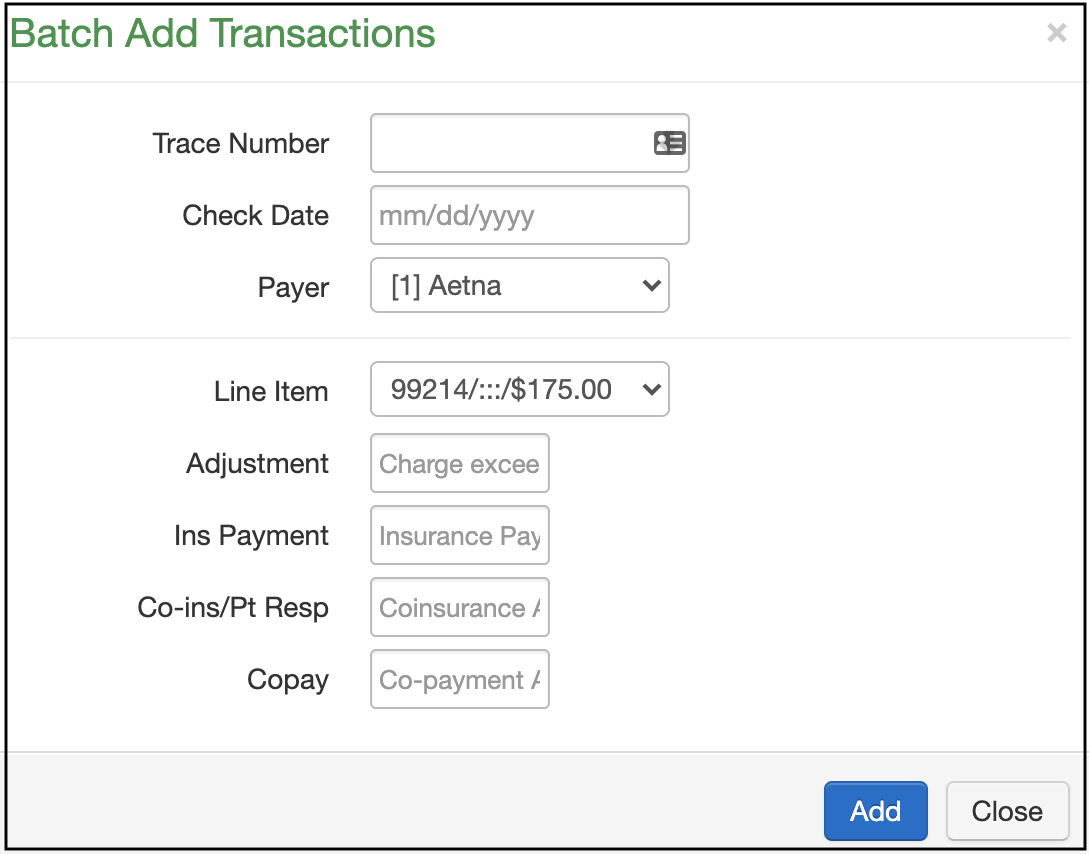
- A Batch Add Transactions window will open that will allow you to post the payer response to multiple line items on the same screen.
- Trace Number - Enter the check number or some other tracking number that is listed on the paper EOB. Adding a scanned copy of the EOB to your Remittance Report section will allow an image to populate next to each payment posted. Check out this article (link) to see how to easily add your EOBs.
- Check Date - Enter the date of the check.
- Payer - The correct payer should be showing, but the drop-down will allow you to select a different payer that is listed on the patient's account.
- Line Item - This will list the separate charges on the account (CPT, HCPCS, and/or Custom Codes).
- Adjustment - Enter the contractual adjustment (or CO45)
- Ins Payment - Enter the amount the payer paid
- Co-ins/Pt Resp - Enter the amount of any co-ins or other patient responsibility (non-covered, max benefits, etc)
- Copay - Enter the amount of any copay assigned.
- Here is an example of how it would look once entered:
- Please note that any copay amount should be listed on the copay line and not included on the co-ins/pt resp line. Doing so will cause it to post with an incorrect claim adjustment reason code.
- Please note that any copay amount should be listed on the copay line and not included on the co-ins/pt resp line. Doing so will cause it to post with an incorrect claim adjustment reason code.
- Once the data for the line item/charge is entered, press Add. The system will post the transactions for you, and it will look like this:


Now you can repeat the same procedure for each line item that is listed on the paper EOB.
Pro tip - Have as many payers set up on ERA as possible. The same information will be sent by the payer, just in an electronic file. This file will come into your DrChrono account, be visible under the Remittance Report section, and will post automatically for you, eliminating the need to post it manually. This will improve efficiency and allow you to focus on other things.
Contact support for assistance setting up. Please note that most but not all payers offer ERAs, but it's worth looking into as more and more are adding the feature.