The billing picklist allows you to create a list of frequently used codes. You can quickly select and add the codes you use most often to a visit.
The billing picklist can be set up under:
- Billing > Fee Schedule.
See our article for more information on the fee schedule.
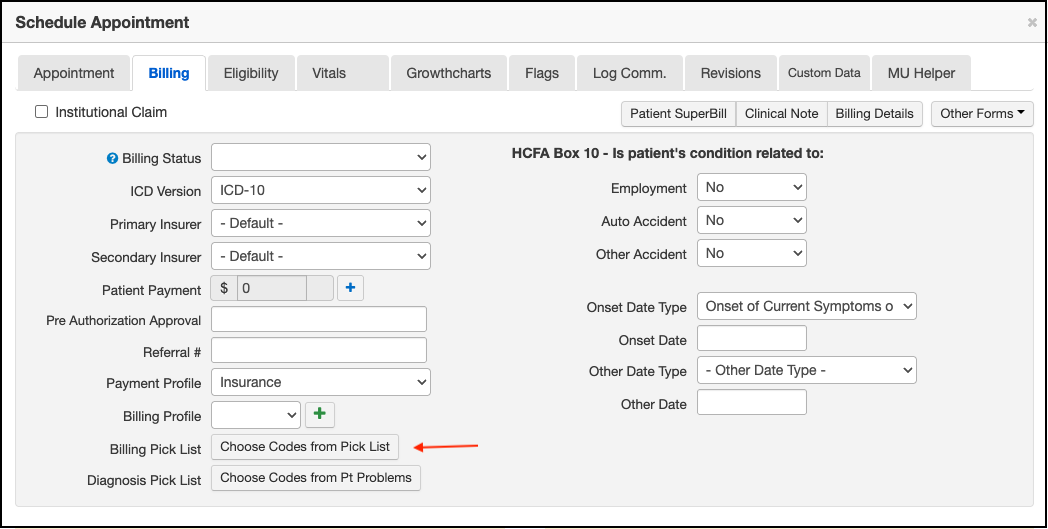
To access the billing pick list from the appointment window:
- Select the Billing tab.
- Press Choose Codes from Pick List.
- Select the codes by pressing on the + next to the code. You can also search for a code.
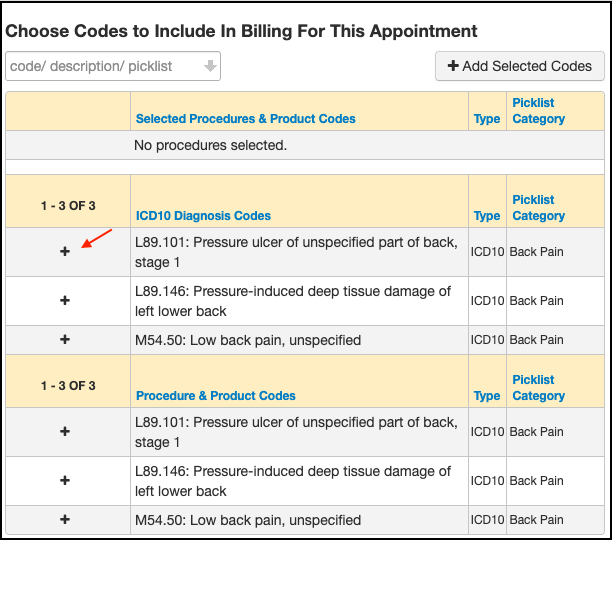
- When finished, press + Add Selected Codes and Save.


You can also access the Pick List through the clinical note.
- Open the note, and select Billing from the menu on the left.
- Select Billing Pick List. Select the codes by pressing on the + next to the code. You can also search for a code.
- When finished, select + Add Selected Codes

The Pick List is also available in the billing details screen in the Live Claims Feed.
- Navigate to Billing > Live Claims Feed
