The adjustment master screen enables a provider to set up their own rules for "Action to be taken" for the adjustment reason codes which will take priority of the current rule of payment posting in DrChrono.
- Example: Currently, in the DrChrono system the adjustment reason code "CO45" will automatically adjust off the balance, however, if the provider wants to transfer the claim to a specific status so it can be reviewed before being adjusted, this screen will allow you to do that.
Create a new rule | Edit an existing rule
Create a new adjustment rule
- Hover over the Billing tab and select Adjustment Master.
- Select + Add New to create a new rule.

- Several new fields have been added to allow you to customize actions even further. The only two required are adjustment reason and action to be taken. Any/All/None of the others can be entered or left blank as the situation warrants.
- Adjustment Reason - Required field. This code will trigger the action you set.
- Adjustment Group Code - Select from CO: Contractual Obligation, OA: Other Adjustment, PI: Payer Initiated Reductions, PR: Patient Responsibility.
- Payer ID - Enter Payer ID if this action only happens when the Payer ID matches.
- Plan Name - Enter only if this action is to happen when the Plan Name matches.
- Patient checkbox: If checked, the rule applies to all patients; if unchecked, it applies only to the patient specified.
- Code type - Select from CPT, HCPCS, Custom, or Revenue code.
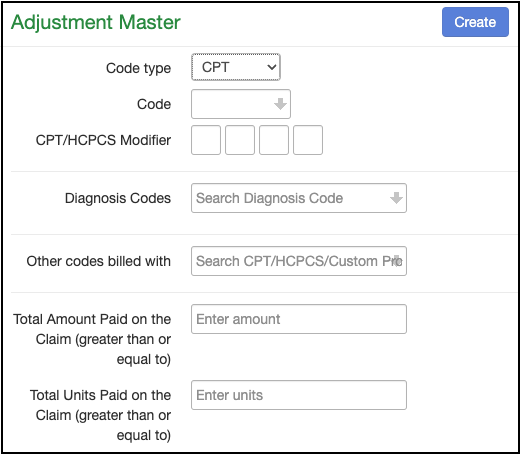
- Selecting CPT will open additional fields that will allow you to further refine your rule.
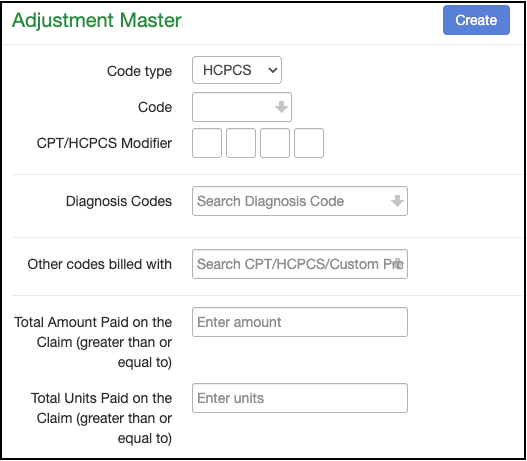
- Selecting HCPCS will open additional fields that will allow you to further refine your rule.
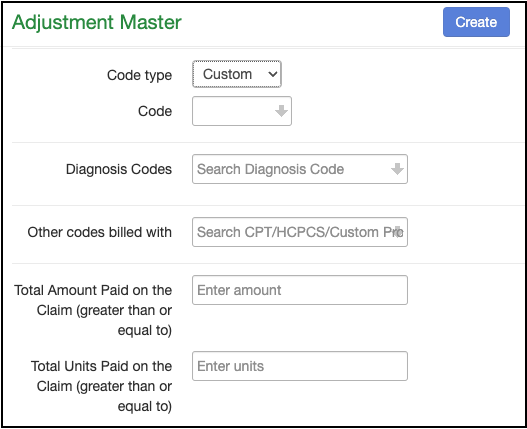
- Selecting Custom will open additional fields that will allow you to further refine your rule.
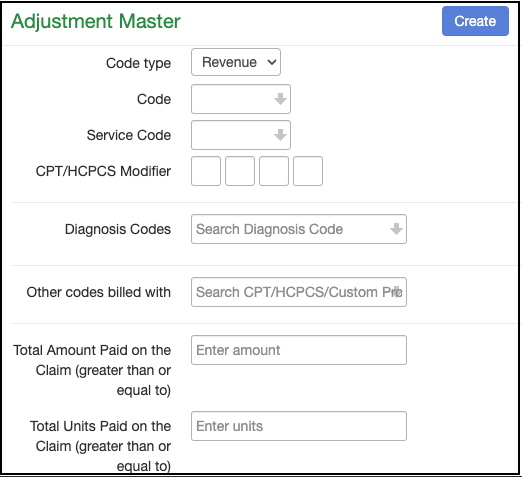
- Selecting Revenue will open additional fields that will allow you to further refine your rule.
- Selecting CPT will open additional fields that will allow you to further refine your rule.
- Total Amount Paid on the Claim (Greater than or Equal to) - Enter the dollar amount in the box where the rule would apply.
- Total Units Paid on the Claim (Greater than or Equal to) - Enter the number of units in the box where the rule would apply.
- Action to be taken - Required field. Select from Interest Payment, Patient Adjustment, Transfer to Secondary, No Action, Transfer to Patient, or Insurance Adjustment
- Once fields are filled in, press Create in the top right of the Adjustment Master box.
Editing an existing adjustment rule
- Hover over the Billing tab and select Adjustment Master.
- Select the blue pencil edit button on the row that coordinates with the rule you would like to update.

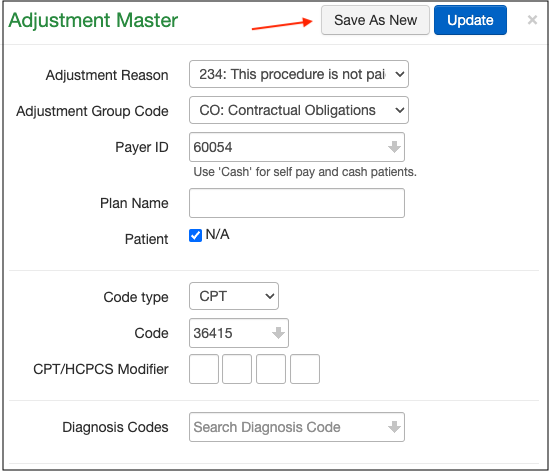
- The Adjustment Master window will open that will allow you to make changes, or save it as a new rule.
- If you have an existing rule for a particular patient that you would like to create for another patient, you can press edit on the applicable row, update the patient name, and press Save As New on the top right. This will preserve the original rule as well as add it for a second patient.
- If the rule is not patient-specific, changes to the rule can be made on this screen. Press Update when complete and the changes will be saved.
- Once the rule is created, the Action will be taken automatically when an 835 file/ERA is received. For manual postings, the changes will reflect once the appointment is saved.


