If you receive a credit card (aka Virtual Credit Card) from a health insurance payer for reimbursement for services rendered to your patients, DrChrono has an easy way to post the payment and attach the associated ERA.
*** Please note, that this feature will only work if you utilize DrChrono Payments as your payment processor ***
- Navigate to Billing > Insurance Credit Card Payments
- The top of the screen offers several different search options if you need to search for a specific payer/payment.

- To add a new insurance credit card payment, press + Add Payment. A screen will open where you can enter all of the details.
- Insurance - the payer who has sent the credit card payment
- Payment Amount - the total amount of the credit card payment received
- Identifier -this could be a remit number, reference number, or any other number listed on the Virtual Credit Card to identify the payment.
- Cardholder Name - name on the physical virtual card received
- Credit Card - the 16-digit number listed on the credit card received
- Expiration - the 2-digit month and 2-digit year
- Security Code - a 3-digit code listed on the code. It might be listed as a CVV code
- Zip/Postal Code - the zip code of the practice
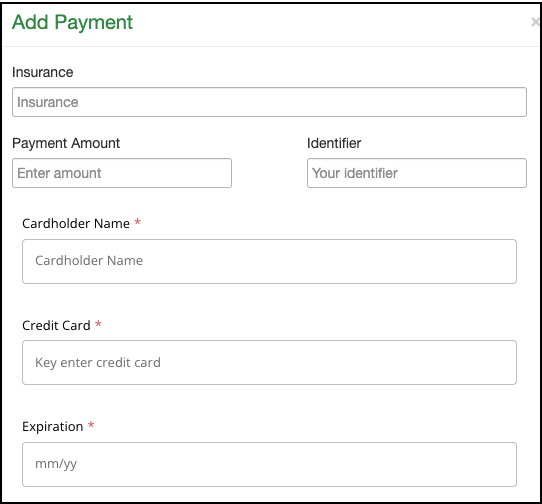

- Once all of the fields are filled in, press Pay with card.
- The entry will appear like this:
(Left side of the screen)
(Right side of the screen)
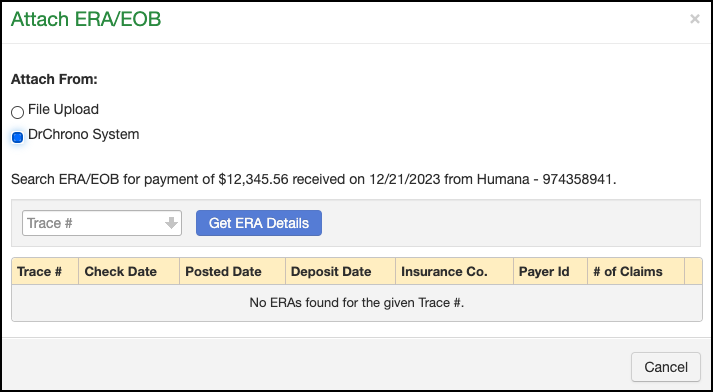
- The ERA file or the scanned EOB by pressing + Attach ERA/EOB
- You have two selections to retrieve the file to attach:
- File Upload - If you've scanned the file to your computer, you can select File Upload to locate and attach the ERA/EOB.

- DrChrono System - If the ERA file is already in the DrChrono system (under Remittance Reports), select that option and a window will open that will allow you to enter the Trace # that will attach the ERA to the payment.
- File Upload - If you've scanned the file to your computer, you can select File Upload to locate and attach the ERA/EOB.
- You have two selections to retrieve the file to attach:
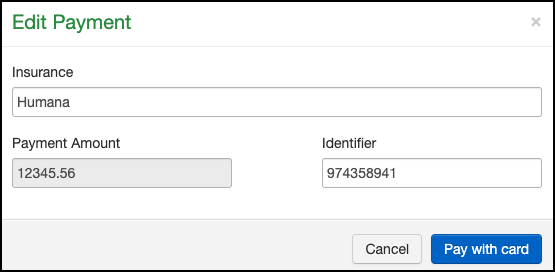
- If you need to edit any of the information listed, you can make them by pressing Edit.
- If the payer has not sent an ERA to accompany the Credit Card Payment, you will need to post the payments manually for each patient appointment included with the payment. You can read more about posting manual payments here.


