In the event you need to refund an unallocated payment in a patient's account, you can do so with just a few steps.
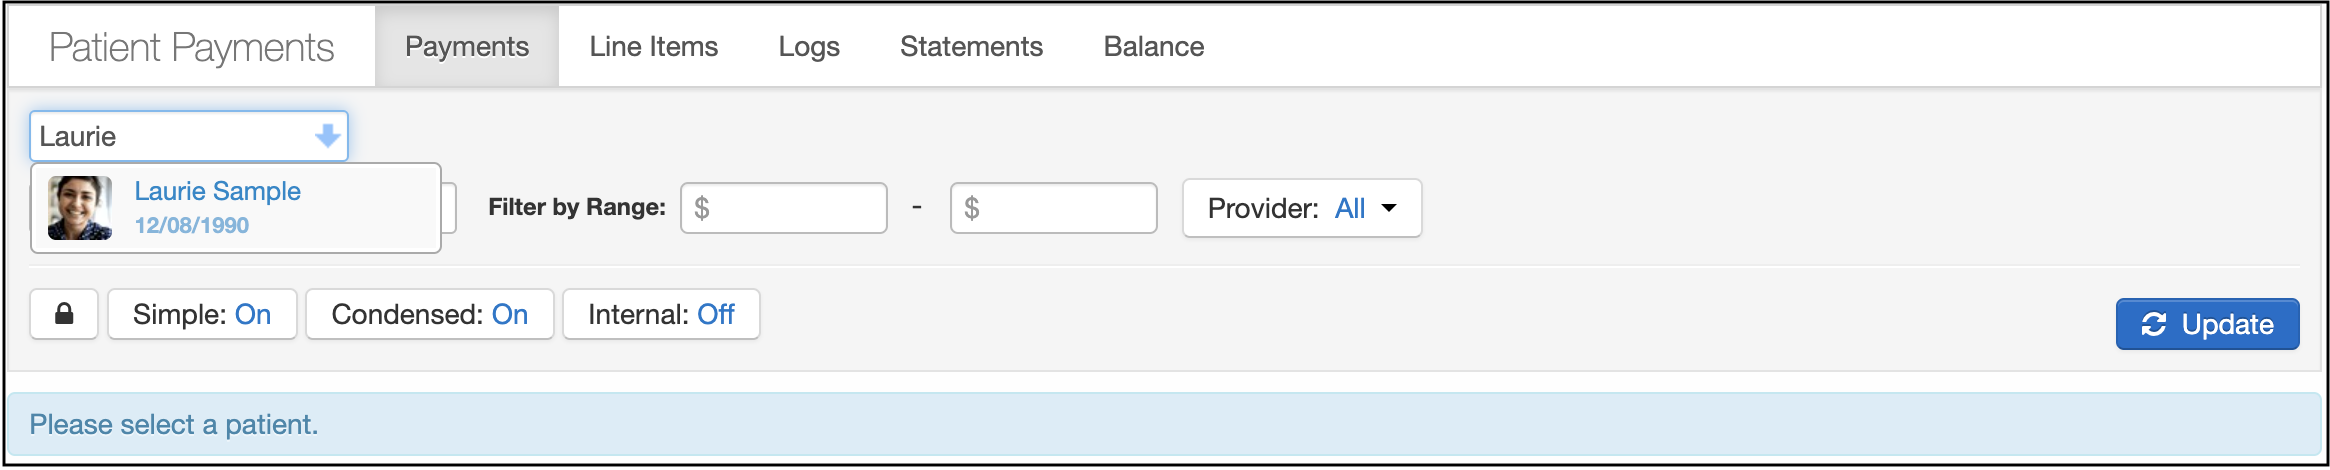
- Navigate to Billing > Patient Payments
- Search for the patient you need to refund the unallocated payment.
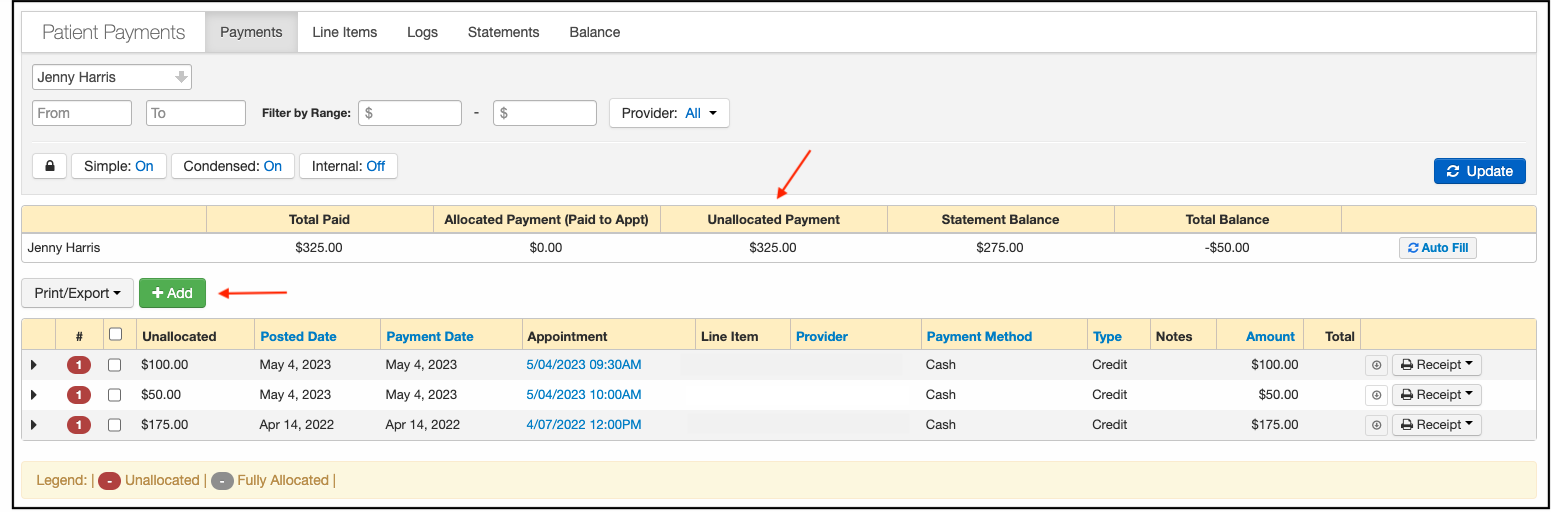
- Once you have the patient's payment history, you can view their unallocated balance. Press the green + Add to start the refund process.
- Select or enter the following:
- Appointment: Unallocated/No Appointment
- Provider
- Payment Method
- Type: Refund
- Notes (Optional, but advised if information on the refund is needed at a later date)
- Amount: The amount needs to be negative.
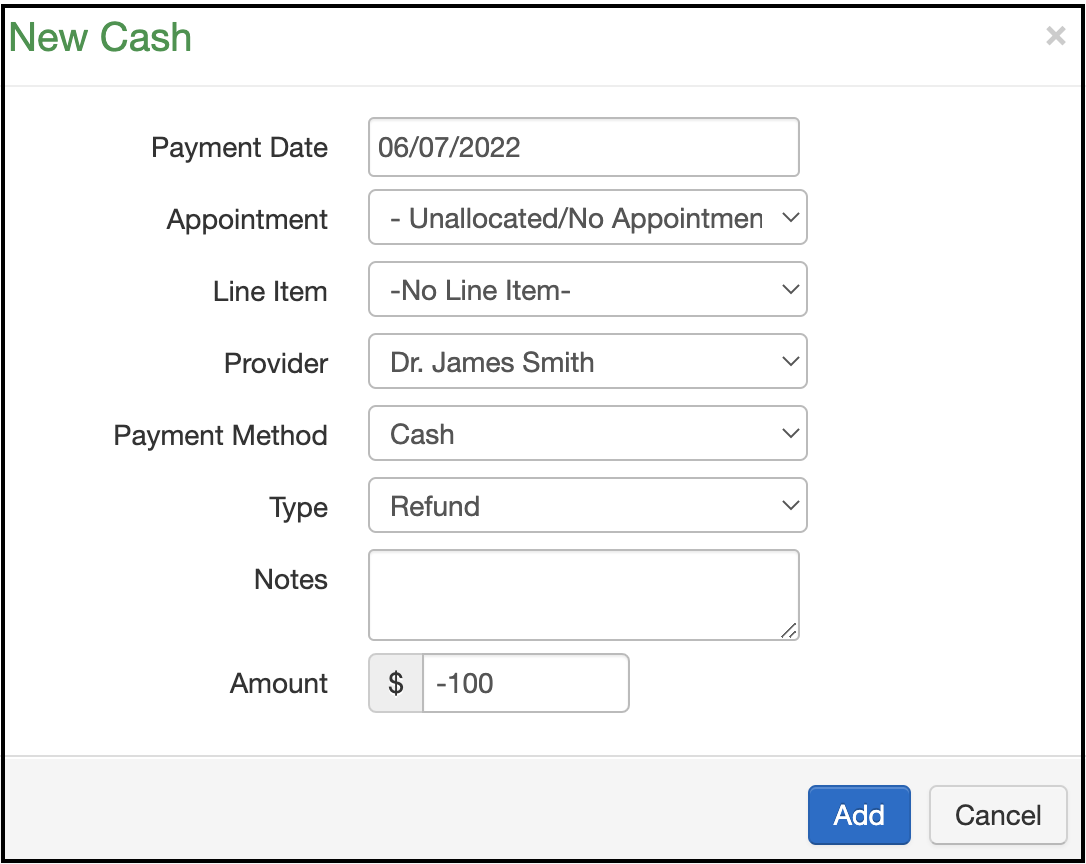
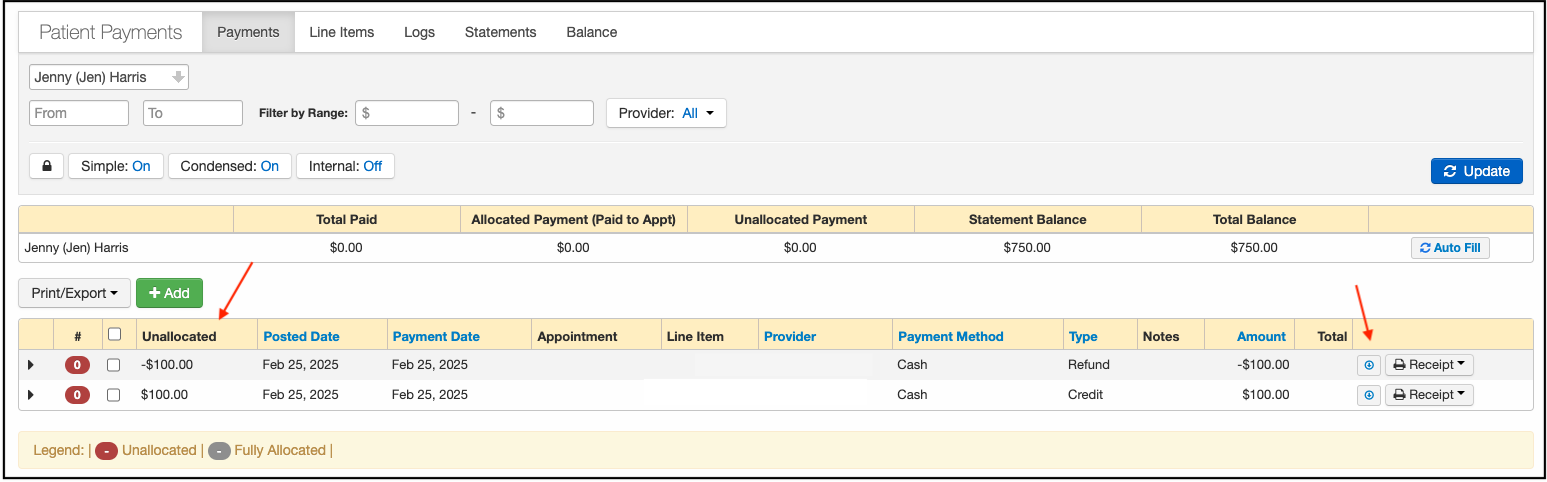
- Press Add when finished. The unallocated payment is now $0.00.
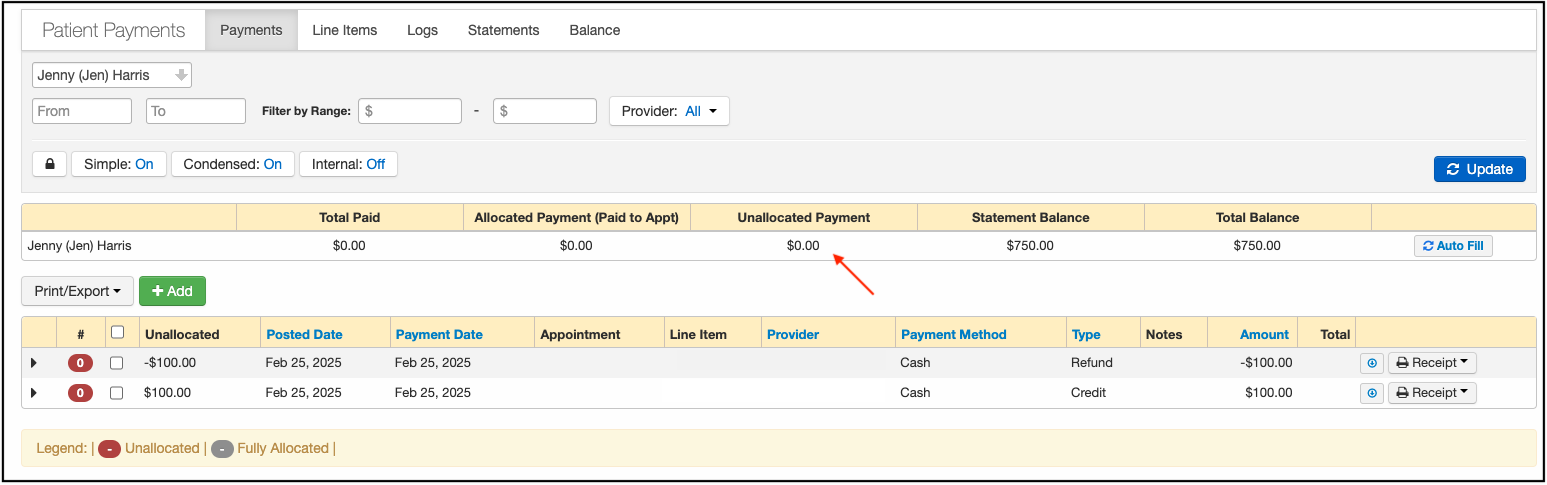
- The next step is to cancel out the positive and negative balances in the unallocated column payments table. If we do not entirely cancel out the balances, they will remain available for future allocations.
- Press the round radio button next to the receipt button.
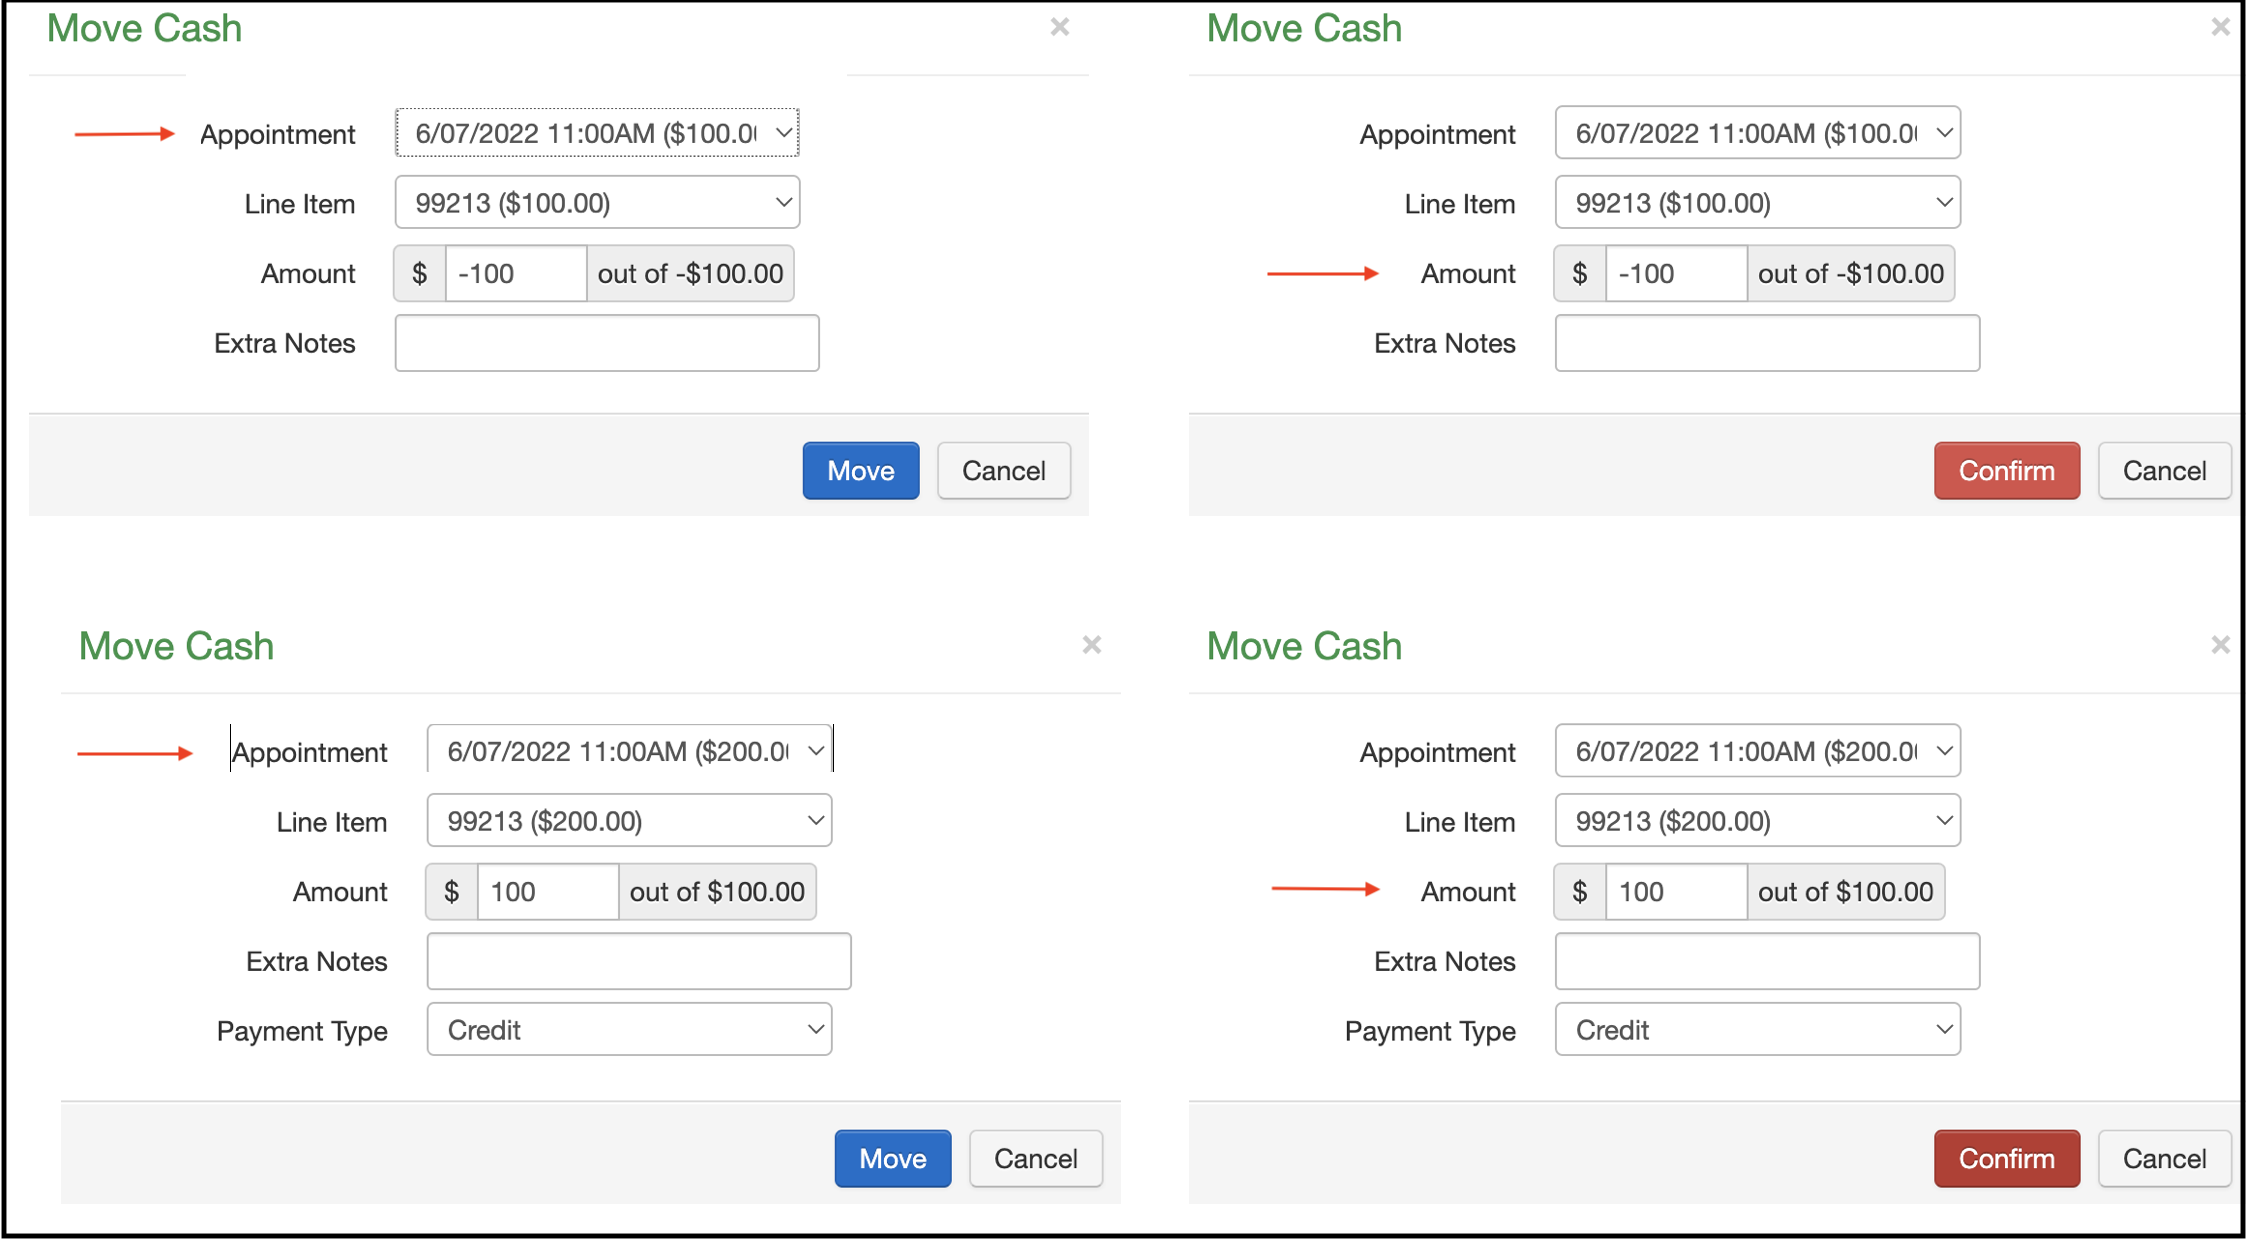
- Select the appointment, press Move, and then Confirm for each unallocated amount.
- The unallocated column will now reflect the full refund for the unallocated payment.


