As ERAs are received from the clearinghouse, they will automatically post to your patient's appointments. If you would like to verify that you have received the deposit or check before the ERA posts to your patient's appointments, the system can do that for you as well.
There is an edit that will need to be turned on in the background to hold the ERAs in your Remittance Reports section and not post them until you manually verify them. You can reach out to your account manager or support and ask them to turn on the "verify era before posting" edit. The ERAs will be held at a practice level and will be posted for all providers/all patients as soon as it is manually verified.
Once the edit is turned on, any ERAs that are received from the clearinghouse will still be found under Billing > Remittance Report. Any ERA that needs manual verification will be listed at the top of the list with Not Verified listed on the far right of the screen.


Once you have verified that you have received the corresponding payment (listed under the ERA Paid column), you will need to:
- Press on the blue check/trace # to see the details of the ERA.
- Press on the down arrow next to the blue Actions button. Select Mark ERA Verified.
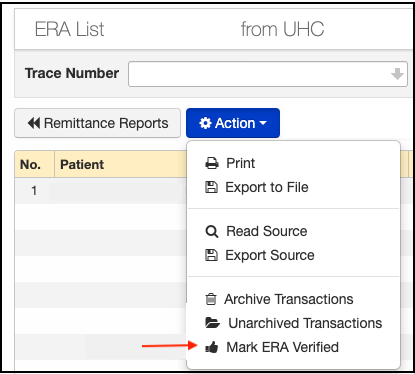
- Once you select Mark ERA Verified two things will happen.
- The individual transaction lines will be posted to each patient appointment.
- The red unverified will change to verified.


