- Create a custom code for the package by navigating to Billing > Coding > New Custom Procedure.
- Enter Quantity Units, Notes, Price, and Type of Product. You have the option to choose either Service or Product under Type of Product. As long as none of the parameters (# of visits, price) change, this custom procedure can be used with the entire patient population.
Please note that only upper-case letters, a period, and/or numbers will be accepted for the code itself. It will not allow a space.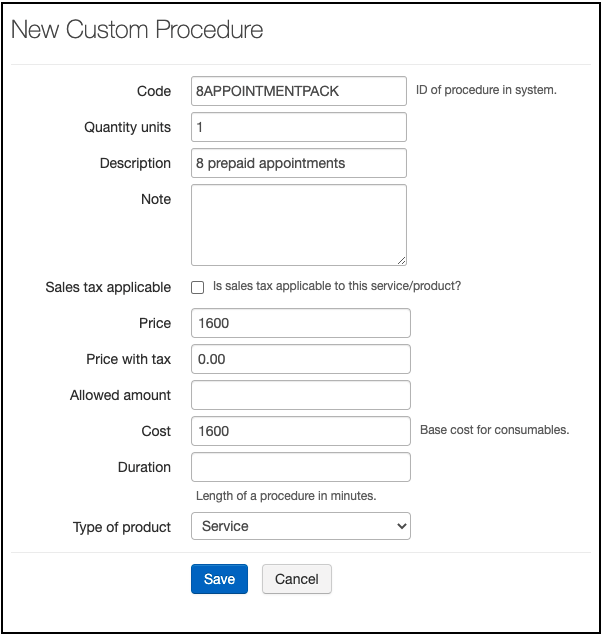
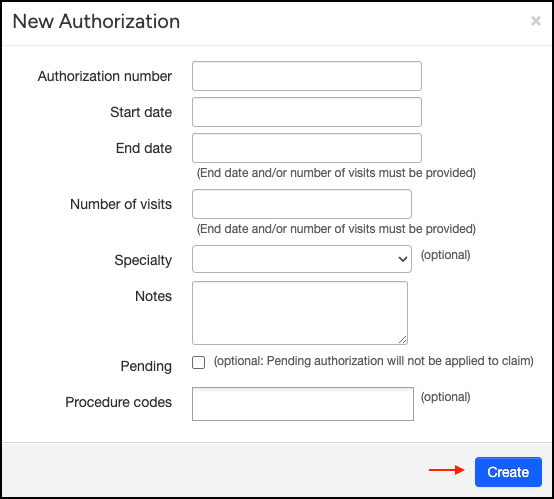
- Navigate to the patient's chart > Demographics > Authorizations > + Add New Authorization


- Enter an authorization number, end date, or number of visits. Press Create to add the authorization to a patient's account.
- The authorization, number of visits approved (total), and the number remaining will show in the patient's appointment.

- The number of visits remaining will appear in the patient's account as the visits are used.

- To view the visits that have been counted towards an authorization, press the blue Authorization # on the left.

- As an authorization nears expiration—either due to the approved number of visits being used or the end date approaching—a warning label will appear on the patient’s account to alert you in advance.

- The patient payment for the package, since it is collected before the services are rendered, will remain in unallocated payments until the service is complete. Review this article to see how to allocate the funds to each service.


