Creating single or multiple offices within your DrChrono account will keep your appointments organized and the billing information for each office correct on claims.
Creating an Office | Reordering Offices | Archiving & Unarchiving Offices
Creating an Office
To create an office:
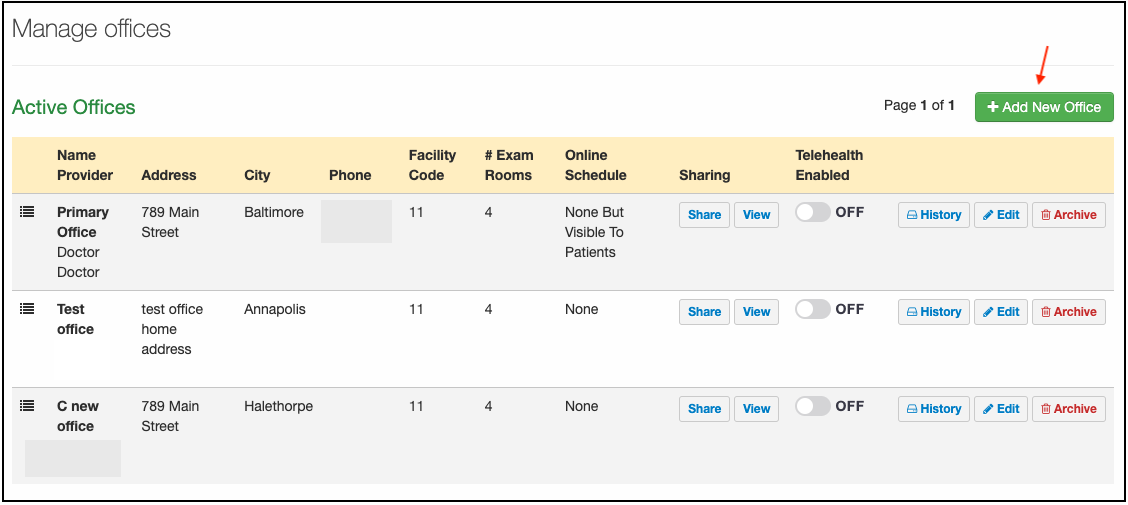
- Hover over the Account and Select Offices.
- Press + Add New Office on the right side of the screen.
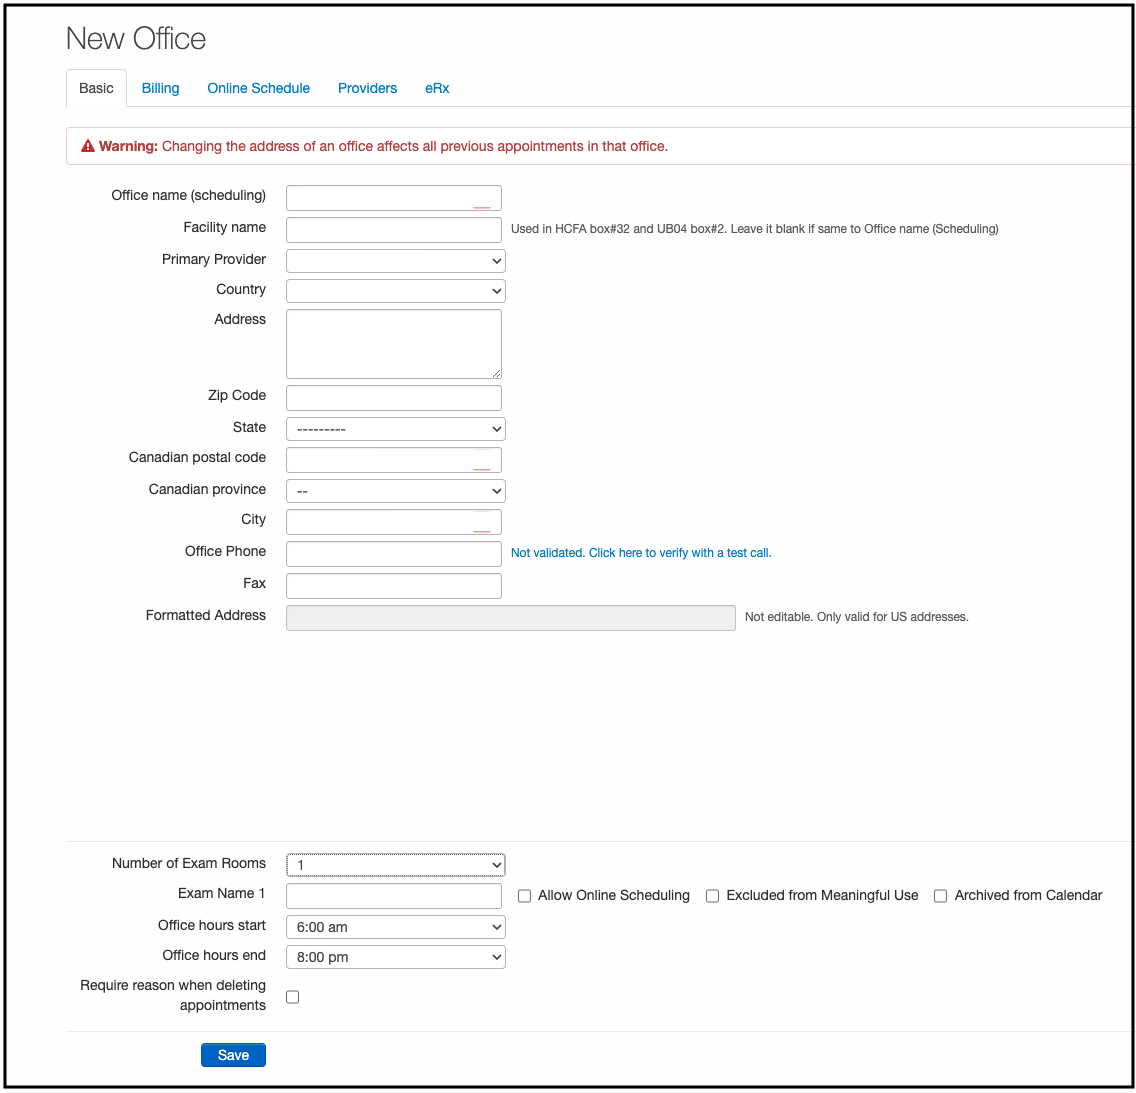
- The Basic tab will allow you to enter the demographic information for the office location. Please note:
- The information listed under FacilityName will appear in HCFA Box #32 and on the UB04 in Box #2. The information entered under Office name (scheduling) will appear if the field is blank.
- The phone number listed under Office Phone will appear as the call-back number in the text and email reminders to your patients with appointments in this office.
- The number of exam rooms for each office are also entered on this screen. The rooms are named, start and end hours listed, and are important for scheduling purposes. You can also allow online scheduling, exclude the exam room from Meaningful Use, or archive it from your calendar.
- The number of exam rooms for each office are also entered on this screen. The rooms are named, start and end hours listed, and are important for scheduling purposes. You can also allow online scheduling, exclude the exam room from Meaningful Use, or archive it from your calendar.
- The primary provider listed on the Basic tab would be the provider listed on the appointment when booked through the scheduling widget.
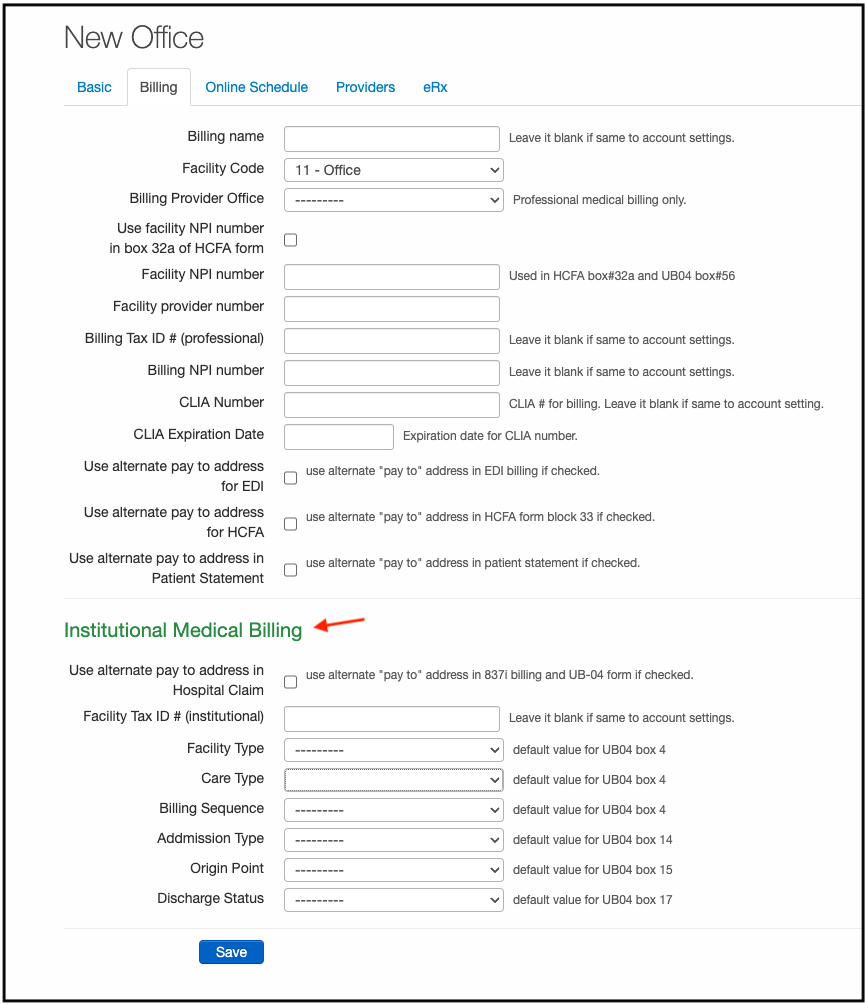
- The Billing tab allows you to enter billing-specific information for the office such as Place of Service, NPI, TIN, CLIA Number, Expiration Date (if applicable), and an alternative pay-to-address.
- Please note, that the options for Institutional Medical Billing will only show if your account is set to bill institutional claims.
- If you provide services outside of your medical office and away from where you would receive your reimbursements, ensure the Billing Provider Office section is completed. This will control what information (office/address) appears in box #33 of the HCFA-1500 form, and which address payments or correspondence could be sent.
- The hierarchy of populating TIN/NPI information on claims is:
- Account Settings (above)
- Insurance Set-Up
- If there is an entry for specific insurances under Insurance Set Up, that entry will override the information listed under account settings for that payer.
- If there is an entry for specific insurances under Insurance Set Up, that entry will override the information listed under account settings for that payer.
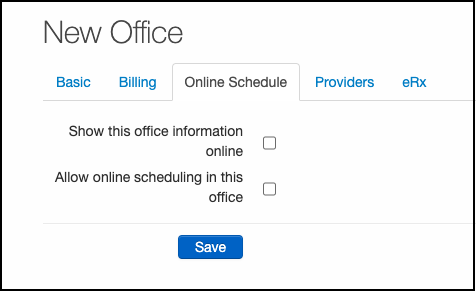
- The Online Schedule tab allows you to select what hours are available for your patients to schedule appointments online. You can enable or disable online scheduling with the Show this office information online and Allow Online Scheduling checkboxes. After checking Allow online scheduling in this office box is selected, a time selection box will appear for you to select the hours to allow for online scheduling. Confirmation emails will be sent to the patient who schedules an appointment using the scheduling widget. You can disable the emails by selecting No confirmation emails box.
- The Providers and eRx Tabs do not limit a provider's access to a single office. It is used for MIPS reporting on prescribing measures and is required by Surescripts. The Surescripts Prescriber ID (SPI) is assigned based on specific details and must be configured for each office. Learn more about Adding Prescriber Information to an Office.


Organizing Your Offices
Reordering offices
- Press and hold the hamburger icon on the left of the screen.
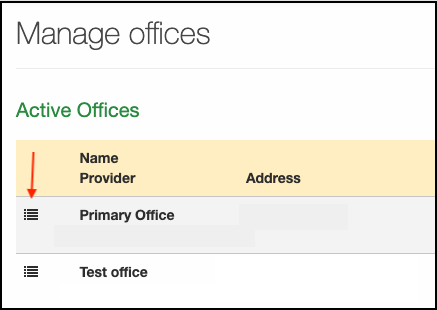
- Drag and drop the entry in the desired position.
- If you have more than 25 offices, they will be displayed on two pages. To reorder, select Show All Offices at the top of your office list. This will allow you to see all offices so you can drag/drop them in the order you select. The switch will only be visible if you have more than 25 offices.


Archiving / Unarchiving Offices
To archive an unused office:
- Select the Archive button next to the corresponding office.

- Once an office is archived, all appointments associated with the office will also be archived.
- Your archived offices will appear under Archived Offices.
- To unarchive an office, select the Unarchive button.
- Once an office is unarchived, the appointments associated with that office will also become unarchived.

