This feature is in beta. If you would like to become a beta partner, please reach out to support.
Accurately managing patients' insurance is critical to smooth check-in and successful billing. The steps below show how to add new insurance, update existing insurance details, and archive inactive insurance records. Following these steps helps ensure insurance information stays current, organized, and audit-ready.
Add Insurance | Edit Insurance | Archive Insurance
Adding an Insurance
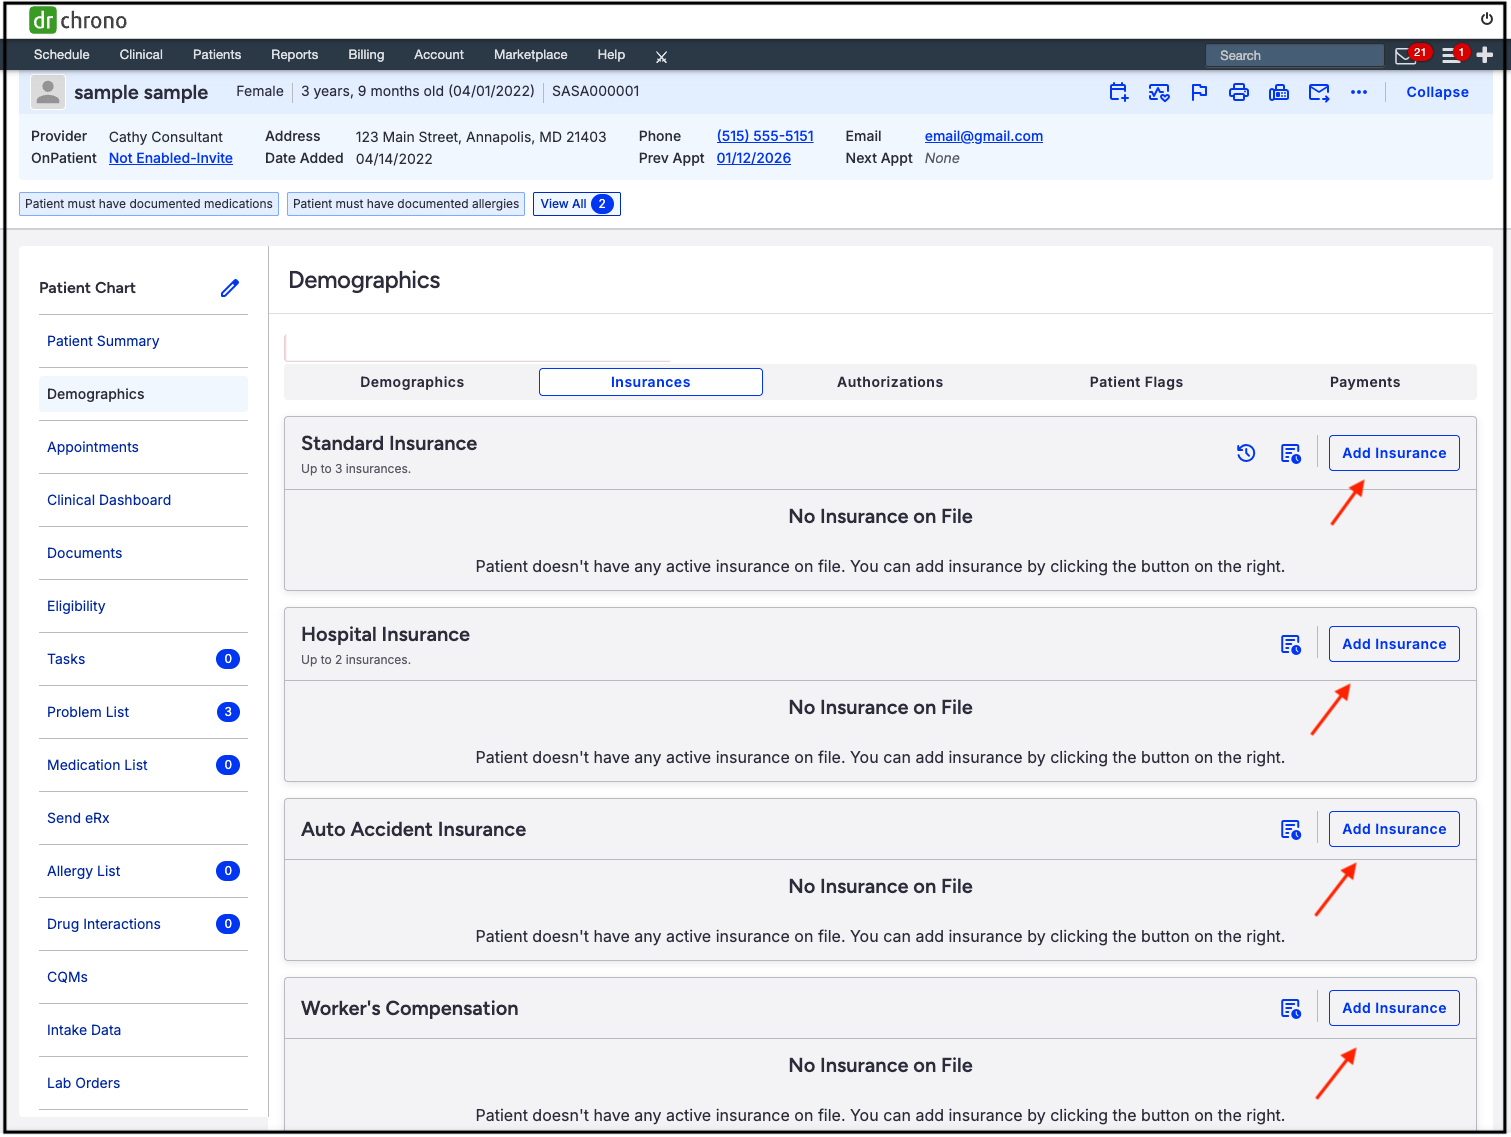
- Navigate to the patient's chart > Demographics > Insurances tab.
- Press Add Insurance in the row that corresponds to the type of insurance (Standard, Hospital, Auto Accident, Worker's Compensation, DME).
- The screen allows the addition of insurance information. The red stars next to Insurance Priority, Insurance (Payer ID), and Insurance ID (Patient's insurance id number) designate them as required fields.
- When adding a payer, there will be an option to create a new payer. Please note that this option will create a paper claim, even if the payer has an electronic payer ID.
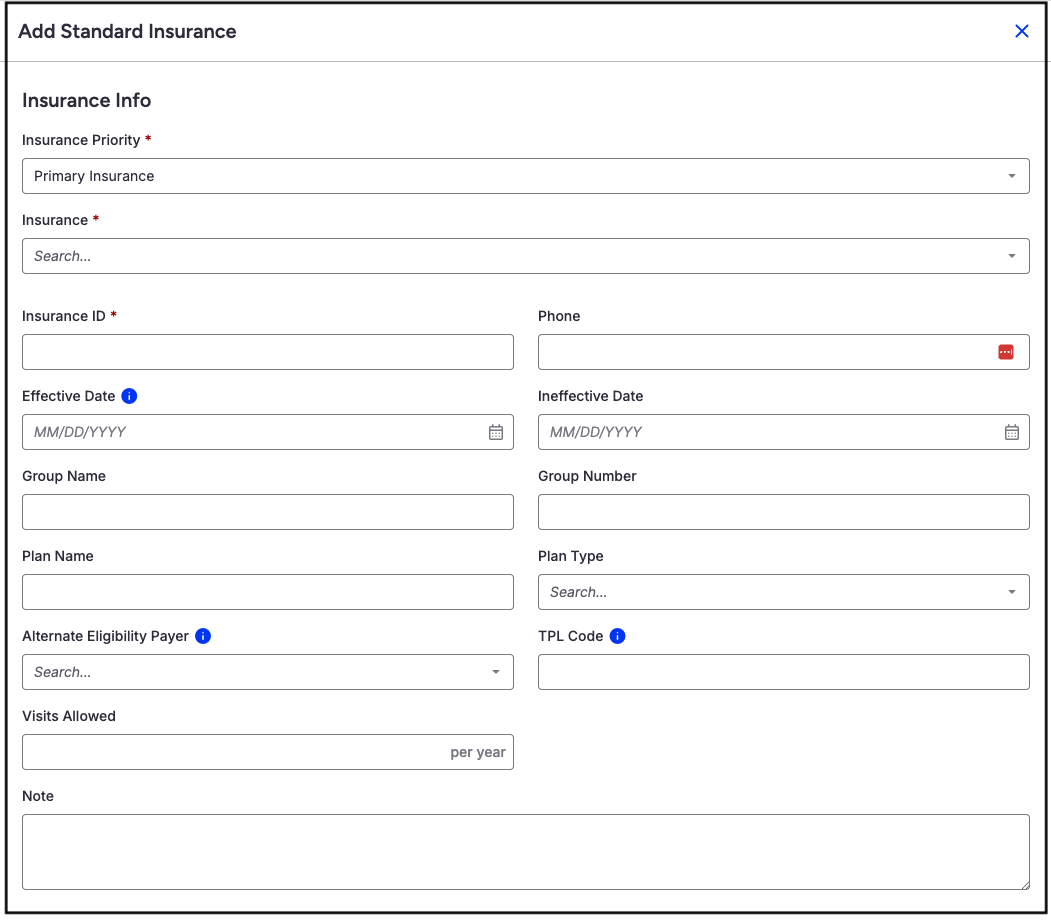
- Insurance Priority -Select Primary, Secondary, Tertiary Insurance for the payer added.
- Insurance - Type the payer's name or Payer ID. As you type, the system will offer options.
- Insurance ID - Enter the patient's insurance ID from their insurance card.
- Phone - Enter the phone number for the payer.
- Effective/Ineffective Date - Enter the effective date of the insurance coverage.
- Group Name/Number - Enter the group name and phone number for the insurance company.
- Plan Name/Type - Enter the plan name and plan type for the insurance coverage.
- Alternate Eligibility Payer - For use where the eligibility information comes from one company, and the claim goes to another payer for processing. This scenario is most common in the chiropractic and mental health fields.
- TPL Code - Identifies other insurance or responsible parties (like private insurance, Workers' Comp) that must pay for a patient's medical care before Medicaid or other primary payers do.
- Visits Allowed - Enter the number of visits allowed per year, if applicable.
- Notes - Enter any applicable notes.
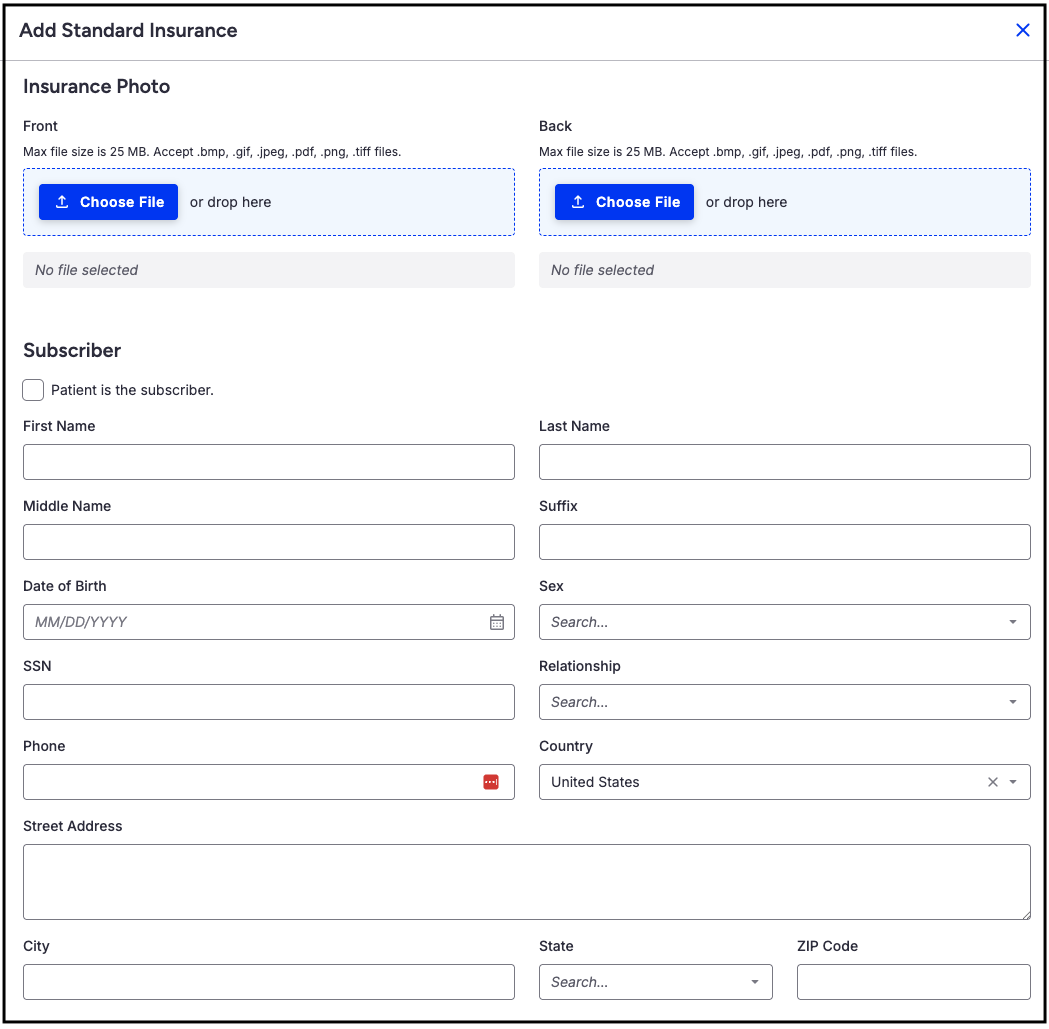
- Insurance Photo - Select the insurance card image from the device, or drag and drop it into the blue box. Acceptable image files include: .bmp, .gif, .jpeg, .pdf, .png, .tiff.
- Subscriber - If the patient is the subscriber, check the box. If the patient is not the subscriber, fill in the fields for the subscriber.
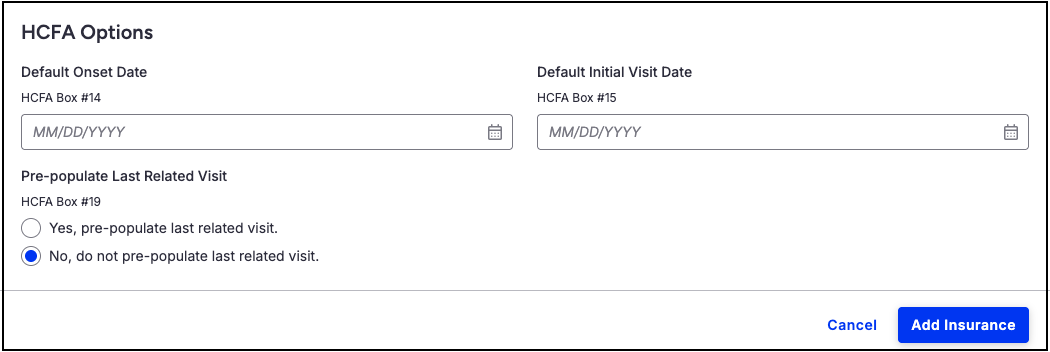
- HCFA Options - Here you can set dates that will populate in HCFA claim forms in boxes 14 and 15.
- Default Onset Date - HCFA box 14
- Default Initial Visit Date - HCFA box 15
- Pre-Populate Last Related Visit
- Select whether or not to include the last related visit on the HCFA form in box 19.
- Press Add Insurance on the bottom right of the screen to save.
- Once saved, the entry will reflect the information entered.
- In the top right, the icons are:
- Star - Defaults the insurance as the primary payer for the patient
- Dual Cards -Runs the eligibility and benefit coverage check
- Pencil - Allows updating/changing of the information listed
- Red Folder - Allows archiving of the payer when the patient's coverage ends.
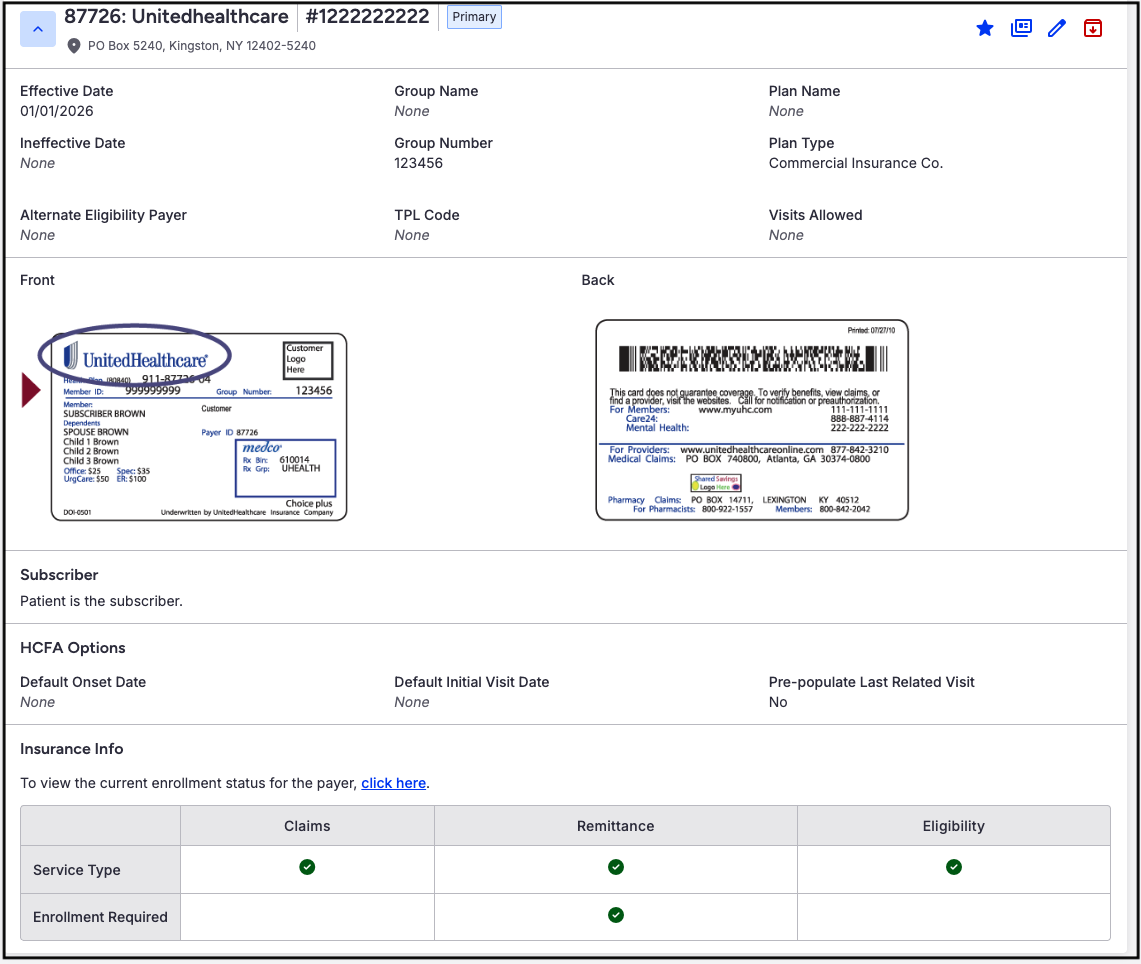
- Insurance Info - The chart identifies services available through the clearinghouse ePS for the payer. If enrollment is required for claims (837), Remittance (ERA/835), or Eligibility (270), it will be notated on the bottom row.


Editing an Insurance
- Navigate to the patient's chart > Demographics > Insurances tab.
- Press the down arrow to expose the payer information that needs editing.

- Press the blue pencil on the right side of the screen.
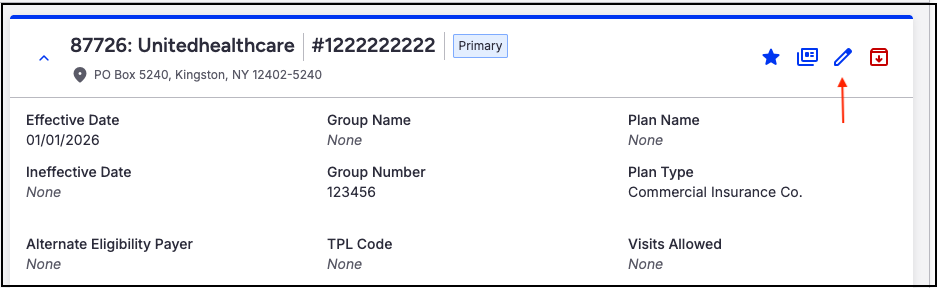
- The edit screen will open so updates can be made.

- Press Save Insurance on the bottom right side of the screen to save the updates.


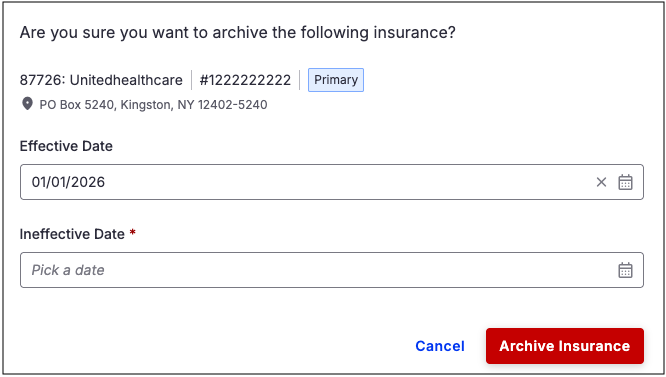
Archive Insurance
- Navigate to the patient's chart > Demographics > Insurances tab.
- Press the down arrow to expose the payer that needs archiving.

- Press the red folder on the right side of the screen.
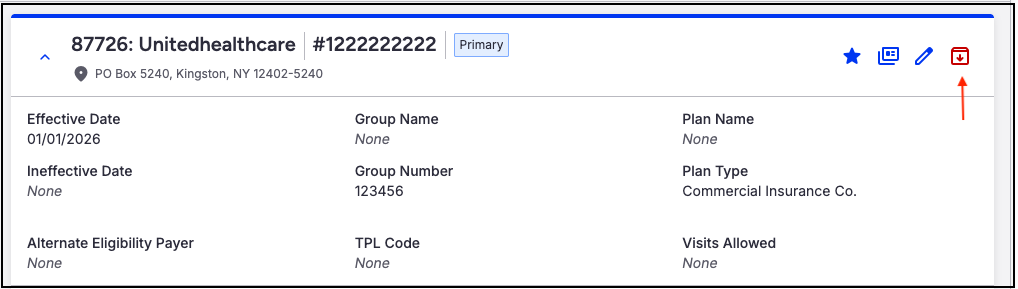
- A confirmation message will prompt entry of an ineffective date and confirmation that the payer should be archived and moved to the patient’s insurance history.