Preparing for a Visit | Recording a Patient Visit | Using the Mobile App | Other Features Available for Mobile and Web Chrome Extension
Additional resources
- Getting Started with EverhHealth Scribe (Installation)
- Customize Your Clinical Note Templates using EverHealth Scribe
- Reviewing and Editing a Clinical Note using EverHealth Scribe
- Sending Your Note to DrChrono using EverHealth Scribe
- Best Practices using EverHealth Scribe
- Template Customization Guide for Clinic Administrators (EverHealth Scribe)
- EverHealth Scribe – Managing Note Templates (Quick Guide)
- Using EverHealth Scribe in DrChrono (Video)
- Using EverHealth Scribe with the Mobile App
- Using EverHealth Scribe with the Mobile App (Video)
- EverHealth Scribe Frequently Asked Questions (FAQ)

Preparing for a Visit
- Access Your Calendar
- After signing in, EverHelalth Scribe will display your calendar view. When you create a new calendar entry in DrChrono, click "Refresh Schedule" in EverHealth Scribe. The system may take a few moments to sync with DrChrono.
- Enable Microphone Access
- When starting your first visit, Chrome will ask for permission to use your microphone. Select "Allow while visiting this site" to avoid being prompted repeatedly. You can also select your preferred microphone if you have multiple audio input devices.
- Select Documentation Template
- Choose the appropriate template for your visit type (e.g., H&P note, follow-up visit, etc.). This determines how the AI-generated content will be formatted in DrChrono

Recording a Patient Visit
Starting the EverHealth Scribe
To return to the calendar click the home icon (top left corner) in the EverHealth Scribe window.
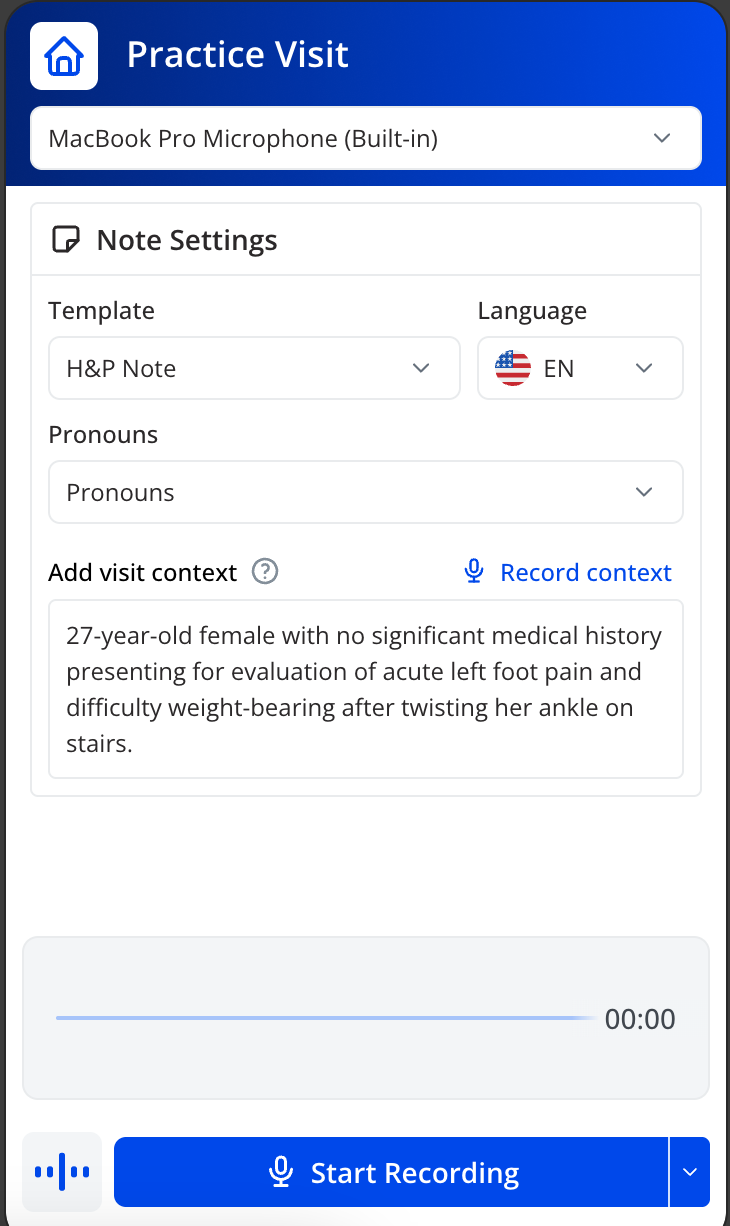 Click on the patient's name in your calendar to open their visit
- (Optional) Add visit context by typing or recording. For example: "27-year-old female with no significant medical history presenting for evaluation of acute left foot pain and difficulty weight-bearing after twisting her ankle on stairs"
- Click "Start Recording"
- A prompt will appear asking you to obtain patient permission. Dismiss the alert when ready
- Conduct your visit normally, EverHealth Scribe will run in the background, transcribing the conversation
 Click on the patient's name in your calendar to open their visit
Using the Ad-Hoc Feature in EverHealth Scribe
The Ad-Hoc button in EverHealth Scribe provides a quick and flexible way to document unscheduled patient interactions—such as walk-ins, urgent consults, or missed appointments that do not appear on the schedule—ensuring important clinical details are captured even when no appointment exists in the system.
Important Limitations
- Ad-Hoc entries are not linked to a specific patient within Scribe.
- Notes created using this feature do not automatically sync with the EHR .
- Encounters cannot be reassigned to a patient retroactively within Scribe.
How to Use the Ad-Hoc Feature
- Click the Ad-Hoc button in EverHealth Scribe.
- Begin documenting the patient interaction as needed.
- Once documentation is complete, copy the note content manually.
- Navigate to the appropriate patient chart in DRC.
- Paste the documentation into the correct section of the EHR.
Best Practice
Use the Ad-Hoc feature only when a scheduled appointment is unavailable. To maintain accurate patient records, ensure that all documentation is promptly copied and pasted into DRC immediately after the encounter.
Pausing or Ending the Visit
- Click "Pause" to temporarily stop the recording and "Resume" to continue
- When the visit is complete, click "End Scribe". The system will take a few moments to process the recording and generate your clinical note.
Using the Mobile App
The mobile app and Chrome extension share the same core features, including editing, coding assist, the magic bar, patient list, and backlog. Any note sent from either platform will appear in the patient's DrChrono chart.
The EverHealth Scribe mobile app works very similarly to the Chrome extension. Once you launch it, you'll land on the same home screen you're familiar with from the extension.
Starting a Visit on Mobile

- Open the EverHealth Scribe mobile app and select the patient from your schedule.
- The first time you use the app, you'll be asked to allow microphone access. Tap "Allow" to enable recording.
- Select your documentation template (e.g., SOAP note, H&P note) and add any optional visit context.
- Tap "Start Recording" to begin. Just like the Chrome extension, the app will prompt you to obtain patient permission before the session starts.
- Conduct your visit normally. The app will transcribe the conversation in the background.
Reviewing and Editing the Note
Once the visit is complete, the app will take a moment to generate the clinical note from the transcript. After it's ready:

- Each section of the note is displayed individually and can be edited by tapping the Edit (pencil icon) button for that section.
- You can now format text directly within the Yellow Notes section using rich text options like bold, italics, and bullet points — making it easier to highlight important information at a glance. Any formatting applied through EverHealth Scribe is preserved when the note is sent to DrChrono, so you no longer need to manually reformat content after the fact.

- You can provide feedback on any section and use the star icon to flag a section as a good example — this helps train EverHealth Scribe over time.
- Each section also gives you the option to copy, print, or delete it as needed by tapping the three dots .

Using the Magic Bar
The magic bar at the bottom of the screen lets you make quick, plain-language edits to the note. For example, you can type something like "Change the patient's age to 34" and the edit will be applied automatically.

Diagnosis and Coding Assist
Tapping into the Diagnosis section will prompt you to accept the coding assist terms and conditions — this only needs to be done once. After accepting, you'll see suggested ICD-10 codes based on the visit. From there you can:
- Review and edit the diagnosis descriptions.
- Copy, delete, or modify codes as needed.
- Add diagnoses to the patient's problem list, with the option to view problems that already exist in their chart. This feature is available on both the mobile app and the Chrome extension.

Sending the Note to DrChrono

When your review is complete, tap "Send to EHR" (top right button). The visit will be marked as closed and you'll return to the home screen. To review what was sent:
- Launch DrChrono and navigate to the patient's chart.
- Open the clinical form and click the section note to view the EverHealth Scribe content in context.
- Make any final edits as needed, then review the complete note to confirm accuracy before signing and locking it.
Other Features Available on Mobile and the Web Chrome Extension
The mobile app and web Chrome extension share the same core features, including editing, coding assist, the magic bar, patient list, and backlog. Any note sent from either platform will appear in the patient's DrChrono chart.
- Backlog: View previous visits that have been closed, paused, or not yet started. You can filter visits or search for a specific one for easy navigation.
- Patient List: Access an ongoing list of patients you've worked with in EverHealth Scribe.
- Support: During beta, the support button in the bottom right corner connects you directly with the Care Pilot team. This will transition to a standard DrChrono support channel at general availability.
